Friday, August 31, 2007

Countdown to Christmas Clipboard

How cute is this?! Kathryn had an awesome tutorial on her blog for these Countdown to Christmas clipboards, so I had to try one for myself.

This is my take on the clipboard, and I will be doing a class on these in November for anyone who's interested!

I started by painting a clipboard with acrylic paint, then adhering designer paper on it. I used the Wintergreen designer series paper with Bravo Burgundy, Always Artichoke and Soft Sky cardstock. For the Christmas tree, I just cut out a triangle of Artichoke, punched some circles out of the paper I used (for decorations), then stuck some buttons on with glue dots. The star is Yoyo Yellow cs punched out with the star punch, then I put VersaMark on the whole thing and embossed it with Iridescent Ice ep. The snowflakes are from the Frosty stamp set.

I made the number tags with the small and regular tag punches and the Best Friends Numbers set. The number tags have magnets on the back that stick to two washers that I've glued to the paper. That way, you can change the numbers as Christmas gets closer! There's also an envelope glued to the back of the clipboard to hold the extra numbers.

And there it is! I wouldn't say quick and simple because it took awhile, but it is a lot of fun!

Thursday, August 30, 2007

Peaceful Wishes Stamp Camp Cards

These are for another class I'll be offering in the fall, called "Peaceful Wishes Stamp Camp". I won't take credit for any of these cards, since I CASEd them all from people on Splitcoast Stampers. I've put the links below for each one, so you can check out the galleries of the talented people who designed these cards. Sorry there are no originals today. I just loved all these cards so much, I had to try them for myself!

These cards are all made with the Peaceful Wishes stamp set. For this class, guests will receive the stamp set to keep and get to make ten cards (two of each) so they can get some ideas of different ways to use the set.

This card is by NCfield. It is made with Mellow Moss and Whisper White CS with Always Artichoke and Whisper White ink.


I love the non-traditional Christmas colours of this card. It's made with Soft Sky, Blue Bayou and Close to Cocoa. It was designed by crooked river.


I modified this card a bit from a card by Jessica. She used River Rock with Real Red (which looked stunning!), but I wanted to make sure I had a traditional-looking Christmas card for the class, so I used Real Red with Handsome Hunter.


The basic design of this card is by cat$dancer. I simplified it a little bit to make it more workable for a class setting. I love the earthy tones of this card.


I CASEd this from Stamp Addict, who in turn CASEd it from someone else, so I'm not sure who the original designer of this card is! It's beautiful, though. I love the Always Artichoke/Bravo Burgundy combination. I use it a lot for my Christmas cards.

So if you'd like to make all these cards and get the stamp set (and you live in my area!), give me a call or email me for more information.

Wednesday, August 29, 2007

Card Candy Winner!

Betty is the winner of the card candy challenge! She made a card with some beautiful card candy on it! Check it out here. Please email me your address, Betty, so I can send your prize to you! Congratulations and thanks for participating!

I also notice that I'm getting close to 5000 hits, so watch out for some blog candy coming soon to celebrate that!

Thanksgiving Cards

These cards are for a Thanksgiving Stamp-a-Stack I will be hosting in September. Guests will get to make fifteen cards (5 each of the 3 big ones) and ten note cards (5 each of 2 designs) that can be used as place cards on the table or as little pocket notes.

I love the new Apple Cider designer paper that is in SU!'s Holiday Mini Catalogue, so it's been fun to play with that!

The stamp sets I used were Give Thanks and Baroque Motifs (this set just works with any holiday - just change the colours!). Of course, I tried to keep with fall colours, so I used River Rock, Pumpkin Pie, Wild Wasabi, Garden Green, Groovy Guava, So Saffron, Close to Cocoa and Chocolate Chip. I coloured in the line images with blender pens using my Classic Ink Pads. The "Happy Thanksgiving" sentiment is from Holidays & Wishes, and the flourish on the note cards is from Priceless.


Monday, August 27, 2007

I Won Bingo!

I actually won Round 2 of Barb's Bingo Challenge last week! We're on Round 3 right now, but I wanted to wait until my prize arrived to announce it so I could show you what Barb sent.

First, here's the beautiful card that Barb made that came with the prize. I love the pretty spring colours and the paper piercing! So cute!

The prize was an assortment of Glitter Stacks paper. Barb sent a whole bunch of 6 x 6 sheets for me. This paper is fantastic! I haven't seen this particular brand before (as I'm a Stampin' Up! girl), but I love it! There is glitter on all the pages so it is pretty and sparkly!

Thank you so much, Barb, for this great prize and for organizing the Bingo. I'm having a blast!

Check out Barb's blog here. She's got some beautiful cards on there, as well as great stories about her life (a particular encounter with a bear comes to mind! *smile*). Isn't this paper great? I'm so excited - I've never won a blogging prize before! I'm off to go play with my new paper!

Alex has Blog Candy!

Hello all! Check out Alex's awesome blog, California Stampin'. She has some beautiful projects on there, and she's offering some fantastic blog candy up to celebrate reaching 2500 hits! Congratulations Alex! :)

Don't forget that you can win some card candy from me as well. Find out how here.

Saturday, August 25, 2007

Oh So Lovely Birthday Card

I can now post the birthday card I made for my sister-in-law, Wendy! We celebrated her birthday and my father-in-law's birthday yesterday as a family (their birthdays are August 11 and 13, but different family members have all been on holidays until this week!). So now that she's seen the card, I can publish it!

I used Beate's sketch from a few weeks ago to make this card. Its base is Soft Sky textured CS, layered with Wintergreen designer paper and Sage Shadow CS. I edged these two pieces with Sage Shadow ink. For the main image, I stamped the flowers from the Oh So Lovely hostess set in Basic Black on Whisper White CS, then coloured them in with blender pens using Purely Pomegranate and Sage Shadow ink. The greeting is from Sincere Salutations, stamped in Pomegranate. This piece was then matted on Pomegranate as well.

And as luck would have it, this will qualify for Barb's Bingo Color Challenge, since I used In Color colours! So we'll get an extra number drawn on Monday! By the way, today is Barb's birthday, so Happy Birthday, Barb! Enjoy your special day! If you get a chance, drop by her blog and leave her a happy birthday wish.

Friday, August 24, 2007

Card Candy, Blog Candy and a Challenge!

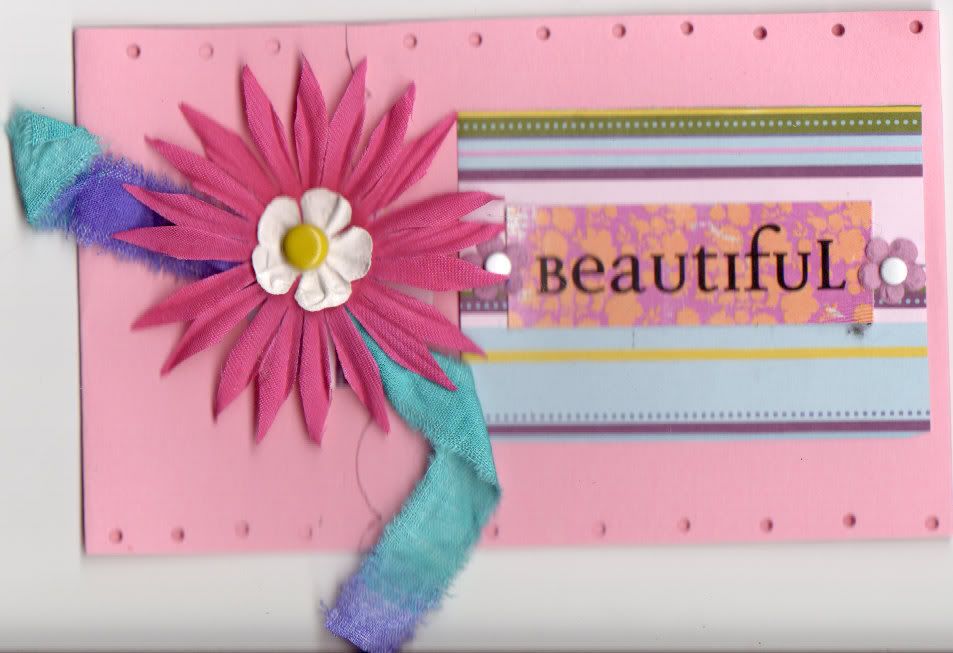
I was searching around on Splitcoast Stampers, and I came across something called card candy. Most of you probably know what this is, but for those who don't, it's little stamped embellishments that you can stick on a card or scrapbook page - you don't have to do the work!

So now I've been busy making card candy to give out as door prizes at my fall workshops. These are a few of the samples I've come up with. I wanted people to be able to use them, but still package them nicely, so to package them, I put a dimensional on the back of each tag, then a glue dot onto the dimensional backing. Then I stuck the whole thing to the cardstock piece with the glue dot, so that when people go to use the "sticker", the dimensional backing is still there and the candy is usable (I hope that makes sense!).


I CASEd the first set (the Christmas ones) from ddstamps on Splitcoast. I just loved her colours (Purely Pomegranate, Wild Wasabi and Blue Bayou) and the Perfect Presentation hostess set just lends itself so nicely to this project. Then I think I got the hang of it, so I tried designing my own. I wanted to use different colour schemes, so workshop guests can choose the card candy that they like (I will be making more - these are so much fun to do!). So for the second set I used Blush Blossom, Almost Amethyst and Sage Shadow with the Priceless set. For the third set, I used Old Olive, River Rock and Bravo Burgundy with the Baroque Motifs and In the Spotlight stamp sets. You can click on the images to get a close-up view.

After I made the candy, I cut a piece of cardstock to mount them on (it's 3 1/2 x 2 7/8"), put dimensionals on the backs, then glue dots as I described above, and stuck the candy on the cardstock. I stamped my information on the back. This piece fit perfectly into the small flat cellophane bags that Stampin' Up! carries. I then stapled a cardstock strip across the top, stamped on a strip of neutral cardstock as a label, then adhered that to the topper. On the back, I stamped the "to/from" stamp from Perfect Presentation. Here's a photo of the back of the candy package.


Now, on to the blog candy! I am offering up some card candy as blog candy, but there's a challenge involved! All you need to do is come up with your own card candy and post it on your blog or Splitcoast gallery. Then leave me a comment with a link to your card candy photo for one entry. For an extra entry, mention this challenge on your blog with a link here (let me know in your comment that you've done this). You can enter as many times as you'd like with different card candy photos. I will have random.org choose a number to determine the winner. I will leave this open until Tuesday, August 28, then choose a number on Wednesday. The winner will get five different packages of Card Candy.

Thursday, August 23, 2007

Workshop Gifts

I've been busy for the past few days getting some things ready for my fall workshops (by the way, I still have some dates available if anyone wants to book - just email me or give me a call!).

These are some bookmarks I made to use as gifts for workshop guests who bring a friend or to use as door prizes.

They are really simple! The base is Blue Bayou (5 1/2" x 2"). Then I layered some Sage Shadow on that. The front is on Whisper White CS, stamped with Sage Shadow (the background) and Blue Bayou flowers, both from the Oh So Lovely hostess set. To top it off, I stapled some double-stitched Blue Bayou ribbon on top.

Then I made some thank you cards for hostesses using the same colour combination. I just got the Cutter Kit, and I've been dying to try out the perforating tool! So I made a hostess card that has a detachable bookmark. The bookmark is obviously the same as the above ones, minus the ribbon (I was going to put some on, but it made the card look lop-sided!). To get the perforations, I put the card in my paper cutter, lined up at 2 inches, and ran the perforating tool over the card through the slot where the cutting blade is.

Then on the left, I stamped some Blue Bayou flowers from Simply Said. For the sentiment, I stamped the saying from Simply Said in Blue Bayou on Whisper White CS and matted it on Sage Shadow. I also stamped the background from Oh So Lovely in Sage Shadow on top of it.

It's a fairly plain card I know, but I wanted the focal point to be the bookmark.

Peaceful Wishes Ornament Card

Here's another card that I CASEd. I saw it on the Stampin' Up! demonstrator webside in the Stamper's Showcase and I absolutely loved it, so I had to copy it! This card was designed by Cathy Millen. I did a Google search for her to see if she had a blog, but nothing came up.

I used the Peaceful Wishes set for this card. I first of all cut a circle out of a piece of scrap cardstock and laid that on top of some Whisper White CS. Then I stamped the berries in the circle (I inked the stamp with Bravo Burgundy and Always Artichoke Stampin' Write markers). After that, I sponged Brocade Blue ink inside the circle. Then I stamped some spots from Itty Bitty Backgrounds in Whisper White craft ink over the whole thing and heat embossed it with Iridescent Ice EP. (It's hard to tell that the spots are there from the photo, but I was trying to make it look like snow!)

After that I took the scrap circle off and stamped the branches in Always Artichoke using repetition (I stamped a few times before re-inking the stamp so there are some lighter branches). Then to make the top of the ornament, I inked the top of a stamp that had an ornament (the "Noel" in Big on Christmas) with VersaMark, stamped it on the ornament (I used my Stamp-a-ma-Jig to line it up), and embossed it with silver EP.

Finally, I sponged some Brocade Blue ink around the edge of the entire card, matted it on Brocade Blue CS and adhered the whole thing to the Always Artichoke card base.

I really like this card, but it would take a long time to make a stack of them, so this might end up just being a display board card for my workshops!

Tuesday, August 21, 2007

Peaceful Wishes Card

Here is another Christmas card that I totally CASEd from Sharon Harnist! I found her card on the SU! Demonstrator website, but I did some searching and found her blog (at least I assume it's the same Sharon Harnist!). I did alter the card a little bit, but it's basically hers!

This is a card I will be demo-ing at workshops this fall, so if you'd like to have one of your own, just book a workshop with me and you'll get one! (You get to keep all the projects I demo at your workshop, along with getting all the other hostess freebies and gifts!)

I used the Peaceful Wishes set for the whole card. The card base is Bravo Burgundy. I stamped the berries and the sentiment on the card in the same colour of ink (although I think I might emboss the sentiment in gold next time). Then I layered Very Vanilla and some Wintergreen paper on top. I distressed the edges of the bottom layer with the Cutter Kit. The image is stamped on Very Vanilla as well. I used Bravo Burgundy and Always Artichoke Stampin' Write markers to ink the stamp. Then I sponged Artichoke ink around the edge of the paper. To finish it off, I used a piece of Hodgepodge hardware (pewter) and tied some burgundy ribbon through it.

Why come up with your own design when someone else has made such a beautiful card already?! Thanks, Sharon, for coming up with this great card!

Autumn Birthday Card

I made this card for my father-in-law's birthday, but I think it fits perfectly with Rhi's Fantastic Fall Challenge as well! I wanted to make a more masculine card, and the new Apple Cider paper (it's in the upcoming Holiday Mini Catalogue) is very "fall-ish" and masculine! I love the autumn colours in this paper!

I found the sketch for this card in the September 2007 issue of PaperCrafts magazine. It was designed by Susan Neal. Her card is more girly, with flowers and pretty feminine colours, so I changed it up to match the designer paper.

The card base is River Rock. I used the Baroque Motifs stamp set for the circles. They're stamped in Close to Cocoa and Pumpkin Pie, punched out with the 3/4-inch and 1 1/4-inch circle punches and adhered with dimensionals. For the main "happy birthday" part, I stamped the words in Pumpkin Pie. The "happy" is from Polka Dots & Paisley and the "birthday" is from Everyday Flexible Phrases. I stamped the little circles in River Rock, Pumpkin Pie and Close to Cocoa. I used Mustard grosgrain to finish it off, although I think it might look better with Chocolate ribbon...

Monday, August 20, 2007

Flaky Friends

Aren't these snowmen cute? I made this as another possible Stamp-a-Stack card. I'm not sure if the colouring would take to long for a SAS, though. I'll have to think about it and see what else I can come up with!

For this card, I went with traditional Christmas colours - Real Red and Glorious Green. I used the Flaky Friends stamp set (another new goodie!) and stamped the images in Basic Black. Then I coloured in the snowmen with assorted Stampin' Write markers. I used some Bashful Blue on the snow to give it a bit of dimension. The stars are Yoyo Yellow, punched out with the star punch. It's hard to tell from the photo, but I stamped the snowflake stamp that comes in the set in Real Red all over the card base to add some texture to it. I like the bold, bright colours in this one!

Sunday, August 19, 2007

Barb's Bingo - Another Card Sketch Challenge

Here's yet another Christmas card! You'll be seeing a lot of those in the next few months! This one is for Barb's Bingo Challenge so she'll draw an extra number for Bingo! I'm one number away from winning, so I'm hoping it gets drawn on Monday! Here's the link to the sketch.

I again used the Wintergreen designer paper, this time choosing the snowflake print paper. I almost just used the snowflake print with plain Sage Shadow for the main part of the card, but it looked too plain, so I added another piece of designer paper instead. I stamped the "Merry Christmas" from Holidays and Wishes in Sage Shadow on Whisper White cs, then matted it on Sage Shadow cs. I stamped the three snowflakes from the Perfect Presentation set in Sage Shadow as well and punched them out with the 3/4-inch circle punch. They looked too plain, so I covered them with VersaMark and embossed them with Iridescent Ice ep. Then I adhered them to the card with dimensionals. Then I thought the "Merry Christmas" looked too plain, so I stamped over it with VersaMark (using my trusty Stamp-a-ma-Jig!) and embossed it with Iridescent Ice as well. So there you have it - quick and easy!

Beate's Weekend Sketch Challenge #15

I really like this sketch from Beate! I made several cards using this layout, including a Thanksgiving, a birthday and this Christmas card. I'll post the birthday card later, since I don't want to spoil the surprise for the person I made it for! I'll post the Thanksgiving card in a few days, as I'm planning a Thanksgiving class in the fall and I'll put up all the pictures for the class when I have everything ready.

So for now, here's the Christmas card. I started with the Wintergreen designer paper. I love the colours in this paper - Sage Shadow, Soft Sky, Certainly Celery and Always Artichoke. They all look so pretty together. I can tell already that I'll be ordering several packages of this paper!

Anyway, I used Soft Sky textured cs as the card base (it's hard to tell in the photo that the card is textured, but it looks really cool in person!). Then I inked the designer paper with Sage Shadow around the edges. I cut a piece of Sage Shadow cs and inked the edges of that as well. For the image, I used the tree in Wondrous Gift. I stamped it in Sage Shadow as well. Then I thought the card needed a little colour, so I stamped the stars in Purely Pomegranate and matted the piece on Pomegranate cs. It was still missing something, so I used my Stamp-a-ma-Jig and stamped the tree again with VersaMark and embossed it with Iridescent Ice ep. Finally, I inked just the words "how silently" from the sentiment stamp with Sage Shadow ink and stamped them on the side of the Sage paper.

Saturday, August 18, 2007

A Couple of Christmas Cards

I finally got some stamping done last night with my new goodies! I'm trying to plan my fall classes, so I wanted to come up with some Christmas cards that would be good for stamp-a-stacks (not too complicated, but still fancy-looking and easy enough to make a whole bunch of them in an evening!). Here are a couple that I came up with. I'm really liking the Stampin' Around wheel a lot lately, so you'll see that here!

This card uses the new Big on Christmas set (I'm loving it!) and the new Christmas Chatter jumbo wheel. I used Real Red, Handsome Hunter and Whisper White for this card. For the ornament in "Noel", I stamped whole word in Basic Black, then stamped the ornament again on a separate sheet, coloured it with Stampin' Write markers and cut it out. I coloured the N, E and L, then adhered the ornament to the word with a dimensional. For the "do not open until Christmas" circle (which is from the Perfect Presentation hostess set), I used the markers to ink the stamp, then stamped it on white. I punched it out with my 1 1/4-inch circle punch, matted it on Hunter, then punched that out with the 1 3/8-inch punch. This is also adhered to the card with a dimensional.

I think this card is so cute! I used Whisper White as my card base and rolled the Snowflake wheel around the edges with Bravo Burgundy ink.

Then I took a piece of Bravo Burgundy and punched three holes in it with the 1 1/4-inch punch. I got another piece of Whisper White and stamped the snowman head from Frosty three times (I tried to estimate where the punched out burgundy circles would line up). I coloured the heads with Bashful Blue, Bravo Burgundy and Handsome Hunter Stampin' Write markers. Then I adhered the Burgundy hole-y piece over the snowman heads so they peeked out of the holes. I stuck this whole thing to the white card base. For the tag, I stamped the sentiment from Flaky Friends in Bravo Burgundy on Bashful Blue cs and punched it out with the Small Tag punch. (Flaky Friends is a set I was eying last year, and I finally just decided to buy it this year!) Then I layered it on Handsome Hunter and punched that out with the Tag punch. I stapled a bit of burgundy grosgrain between the two layers (I would have put it on top, but it covered the words up). I adhered the tag to the card with a dimensional (I'm getting a lot of use from my dimensionals!).

These are a couple of the cards that I will be doing at workshops and stamp-a-stacks in the fall. If you're interested in signing up for a class or hosting a workshop, let me know!

I'll have time to stamp some more tonight, so I'll post more goodies tomorrow! I also just got the Wondrous Gift set, so I'm itching to use that tonight! Thanks for reading!

Friday, August 17, 2007

One Last Quick Comment!

I got my stamp area cleaned up and even managed to make a few Christmas cards! I can't post them yet because I don't have the camera right now.

So, I've been playing around with my blog layout, colours, etc. If you've visited during this process, I apologize for some of the experimental looks you may have seen! I had a big jumble of colours and pictures at one point! I think I like this header I found on a free site. I'd like to learn how to design my own, but I don't have time right now! I don't think I have the software either.

If anyone can tell me an easy way to make my own, I'd appreciate it!

Also, please let me know what you think of the new look! Okay, I think I'd better get to bed now. Good night!

Check This Out!

You have to go visit Judy's blog and watch this video (click on the "Heroes" link). I'm sitting here bawling - it's so moving! Her town welcomed home soldiers who just returned from Iraq. Need I say more?

Stamping Deprived!

Just a quick note tonight. I haven't had a chance to stamp in two days! I'm so distraught! LOL! I actually have some time right now, as my husband took Adam camping (real camping this time - at a campsite in Wabamun) and Noah is in bed. But my craft area is such a mess (yes, again!) that I have to clean that up before I can start on anything new. Besides, Ian took the camera camping with him so he could document the whole camping experience, so I wouldn't be able to photograph anything I make tonight anyway (that's assuming I can get everything cleaned up and still have time to stamp before I go to bed!).

I just got a huge order in of Christmas stuff so I want to plan my fall classes soon. I've been mounting stamp sets all afternoon whenever I had a few minutes! I'm itching to dive into the big SU! box of goodies!

So, I'm off to clean up. I'll check in tomorrow, hopefully with something to show for my free evening! Thanks for stopping by!

Monday, August 13, 2007

Metallic Birthday

I made this card for Rhiannon's Mo' Metallic challenge. I used the sketch from Beate's challenge so I can use it for both!

It was my sister-in-law, Wendy's and my friend, Jackie's birthday yesterday, so I made this card for Jackie. (I can't post Wendy's card yet because we're celebrating her birthday later, after her parents get back from holidays, so I haven't given it to her yet! I'll post it after we have the party.) Anyway, Happy Birthday Wendy and Jackie!

I used Very Vanilla as the base of the card, then put some River Rock coloured Brocade Background designer paper on that. For the smaller pieces, I used more Brocade Background paper, matted with Old Olive and River Rock.

The metallic parts of the challenge are the gold brads, the greeting from Sincere Salutations (embossed with Gold Glory EP) and the faux metal accent. For the accent, I punched circle with my 1 3/8-inch punch, then put VersaMark over the whole thing. I then poured Gold Glory ep over it and heat set it. I repeated this three times. After the third time, I set the flower stamp from Priceless into the EP while it was still warm, left it there a few seconds, then pulled it out. (You can see a tutorial on faux metal here.) When that was finished, I mounted that piece onto a circle of Old Olive and adhered the whole thing to the card with a dimensional.

I also made this cute little matching gift box to hold her present. I learned how to make this from my friend, Kristine. It's a 12 x 12 sheet of Old Olive cs. I stamped the flourish from Baroque Motifs all over it in the same colour of ink. Then I scored it at 4 inches all the way around and cut out the corner squares. Then I folded up the sides to make the box. I put gold eyelets in all the corners and tied them together with some gold metallic cord that I had left from last year's SU! Catalogue (I'm so upset that they discontinued this cord, but I ordered some of the elastic gold cord from the upcoming Holiday mini catalogue.) For the accent, I stamped the flower from Priceless in VersaMark and embossed it with Gold Glory EP. I punched it out with my 1 1/4-inch circle punch, then matted it on Chocolate Chip and punched that out with my 1 3/8-inch circle punch. I stuck this onto the box with a dimensional. It's the perfect size for the inspirational mug I bought her for her birthday!

Weekend to End Breast Cancer Kudos!

I want to congratulate my sisters-in-law, my mother-in-law and my friend for completing the 60 km Weekend to End Breast Cancer walk in Edmonton this weekend! Wendy, Twyla, Margo and Kate walked all day Saturday and Sunday after fund-raising all year for this event. In total, the walk raised over 4 million dollars towards breast cancer research with over 1300 people participating!

Congratulations Wendy, Twyla, Margo and Kate for a job well done! You are an inspiration!

Sunday, August 12, 2007

Scrapbooking (finally)!

I've been feeling burned-out lately, so my amazing husband gave me a couple of days off! I didn't have to be "the mom" for two whole days! Now, I love my kids and I wouldn't give up being a mom for anything, but sometimes I just get tired and need a break! Who's with me?!

So for the past two days, I have been in my basement craft room scrapbooking! It has been months and months since I did any scrapbooking - I've been focusing so much on cards. Cards are fun to make when you have a few minutes to do something, but I always find scrapbooking to be a major undertaking. So it was nice to have a huge chunk of time to get lots of it done! My goal was to scrapbook all of 2007's photos to date (yeah, right!). Well, I didn't quite get it all done, but I got a good chunk finished! I have a nice big stack of scrapbook pages that I now need to buy page protectors for so I can put them in an album! It never ends! LOL!

My scrapbooking style is pretty simple. I know some people like to spend hours on a page to make it just right. I have too many photos to scrapbook to spend that much time on one page. I go for quantity!

I wanted to show you one of the pages I did of Adam in a pirate costume. Noah got a Little Tikes outdoor play ship for his first birthday, and it came with some pirate costumes. The costumes are way too big for Noah, so we let Adam play with them. He loves to dress up as a pirate, and we've taught him some great pirate phrases like, "Ahoy there, Matey" and "Shiver me timbers!"

I made the layout of the page fairly simple in order to show off the photos. The page itself is Confetti White. I highlighted the main photo by matting it in Real Red and Tempting Turquoise to match Adam's pirate costume. The three smaller photos are matted in one colour (either the red or the turquoise). The Ahoy, Matey stamp set was, obviously, perfect for this page! I stamped a heading and title bar and coloured it in with blender pens using Real Red, Tempting Turquoise and Sahara Sand (I would have used gray, but I don't have that colour of ink!). I also used a black marker to colour in some of the items. And there you have it! Quick and easy!

I'm hoping to get a few more pages done since all my scrapbooking stuff is out already, so I will try to post a few more pages in the days ahead. Thanks for visiting!

Saturday, August 11, 2007

Beate's Weekend Sketch Challenge #14

Here's my card for Beate's Challenge this weekend.

I chose to go monochromatic again! Next time I'll try a few more colours! I just think that using one colour looks so elegant.

For this one, I chose my designer paper first. I had an unopened package of the Close to Cocoa print dp, so I cracked it open. I was going to use Close to Cocoa cardstock, but I didn't like the look, so I went darker and paired the paper with Chocolate Chip cs. I just used three different patterns from the dp, inked the edges and matted the pieces on the Chocolate cs. I stamped the small flourish from Priceless onto the left-hand piece to give it a bit more texture. For the circle, I stamped the flower from the same set in Chocolate Chip onto Close to Cocoa cs and punched it out with the 1 1/4-inch circle punch. I matted this onto Chocolate cs and punched a 1 3/8-inch circle. I put a bit of Dazzling Diamonds glitter on the center of the flower and attached it to the card with a dimensional. The "mon amie" sentiment is from the Carte Postale set.

Friday, August 10, 2007

Barb's Bingo - Card Sketch Challenge

I've been participating in Barb's Bingo Challenge for the past week. It's so much fun! She made a whole bunch of Bingo cards and emailed them to people who signed up, and she's been calling numbers for us to win prizes when we get a Bingo. She also gives us a sketch challenge, and when someone submits a card for the sketch, she draws an extra number. It's not too late to join, so head over to her blog and let her know if you want in on the fun!

So here is my card for her recent sketch challenge.

I used Very Vanilla as the card base. Then I put some Brocade Background designer paper over it. There is some Chocolate Chip grosgrain ribbon to cover where the two papers meet. For the ATC on the card, I used more Very Vanilla and Brocade paper. The sunflower image is from a retired set called Provencal. I stamped it in Basic Brown and coloured it in with blender pens and So Saffron, Old Olive and Chocolate Chip ink. I used direct-to-paper with River Rock ink to tie in the colour in the designer paper, then put a strip of Chocolate Chip grosgrain across the bottom.

I really like this sketch. All you really need to do is design an ATC (Artist Trading Card), then find some designer paper that goes with it and put it all together on a card!

Thursday, August 9, 2007

Dazzling Diamond Dust Baroque

Here's a little something I did while I was trying to come up with a project for my Stamp Club. I wanted to show them the Dazzling Diamond Dust technique, so I was playing around with my stamps to find a way to do it! This isn't the card I ended up doing with them - I'll post that one tomorrow after I take a picture of it!

For this sparkly card, I stamped the image from Baroque Motifs on glossy white paper in Soft Sky and Blue Bayou ink. After the ink dried, I patted VersaMark all over the paper and sprinkled Iridescent Ice embossing powder over the whole thing. Then I heat set the powder with my heat tool. Super easy and so pretty!

I matted the stamped piece on Soft Sky and used Blue Bayou as the card base. To finish it off, I slid a paper clip from my Pewter Hodgepodge Hardware over the bottom right corner and tied a piece of Blue Bayou double stitched ribbon on it. Quick and simple!

Wednesday, August 8, 2007

Stamp Club Gift


Since last night was the last night of Stamp Club for my current group, I made a little gift to give everyone as a thank you. This group was my first stamp club, and they are such a wonderful group of ladies. I had such a good time each month with them! (For those stamp club members who weren't there - I will put this gift in with your order when it comes!)

I made them each a little "fry box" using a template from the SU! demonstrator website. It's made out of Sage Shadow cs with Blue Bayou and Very Vanilla accents. I stamped the images with the Priceless stamp set. The circle is punched out with the 1-1/4-inch circle punch, then mounted on a 1-3/8-inch circle of Sage Shadow and adhered with a dimensional.

I printed the sentiment from my computer onto Very Vanilla cardstock and punched it out with the small tag punch. Then I mounted it on Blue Bayou cardstock and punched that out with the tag punch. The sentiment reads "So many 'riesens' to be thankful for you..." The little cello bag inside has some riesens candies and caramel kisses in it. It is tied with natural hemp twine.


Just a reminder: New stamp clubs will be starting in September, so if you are interested in joining one, please let me know!

Tuesday, August 7, 2007

Scratch & Sniff Card

I've been wanting to try this for awhile. I saw the technique in the August issue of Stampin' Success magazine (it's a magazine that Stampin' Up! demonstrators receive from the company each month). The card itself is pretty simple, I know, but the rose smells like cherries! It's such a cool technique.

To make a scratch & sniff card, all you need is some clear embossing powder, a heat tool and some sugar-free drink powder. How cool is that? I used sugar-free cherry Kool-Aid for this, but you can use coffee flavors, cocoa, other Kool-Aid flavours, etc. It has to be sugar free, though, because sugar will burn when you heat emboss it (creme brulee anyone?).

So what you do is mix one-and-a-half parts clear embossing powder with one part drink mix (I did 1 1/2 tsp of ep to 1 tsp of drink mix). Stamp your image with VersaMark and pour the embossing powder mixture on top. Tap off the excess powder and heat it with the heat tool until the powder melts. Voila! Then you just finish your card.

I chose the colours for the card after I had embossed the flower because the embossing powder kind of takes on the colour of the drink mix. My flower looks lighter in the picture, but it's a pink colour. I chose Purely Pomegranate and Wild Wasabi to go with the image. I did stamp over the embossed image with the coordinating two-step stamp in Pomegranate ink just to add some dimension - you can see the ink around the edges of the flower and in the middle. The images are from the Wild Rose stamp set, except the greeting, which is from Sincere Salutations.

RAK at my Door

Look what was on my doorstep this morning! I've been feeling overwhelmed and discouraged lately with all I have going on. And it's tough being a mom! Someone knew I needed a cheering up!

Thank you so much to whoever left this on my porch! (I think I know who it is...) I really needed this today. Hopefully you can see the message on the paper - it is a verse from Jeremiah 31:25 "I will refresh the weary and satisfy the faint." The message at the bottom says, "Be encouraged today Shannon."

I am so touched! Thank you, thank you, thank you!

Monday, August 6, 2007

Marbled Polished Stone Technique

Here is one of the cards that my stamp club will be making tomorrow. This uses Polished Stone Technique, but kicks it up a notch!

For the polished stone background, I used Perfect Plum, Certainly Celery and Bashful Blue re-inkers. I put some rubbing alcohol on a cotton ball, then applied a few drops of each colour and dabbed them onto some glossy white cardstock. After that dried, I put a few drops of each colour into an empty stamp container with about four marbles. I closed the container and rolled the marbles around until they were coated with ink. Then I put the cardstock in the container and rolled the marbles over the polished stone pattern. (It's okay that the back of the cardstock is totally covered in ink as well!)

After the cardstock dried, I stamped the butterfly from Priceless (my new favourite stamp set!) in black Staz-On, then matted it onto Perfect Plum and Basic Black cs.

The card base is Perfect Plum as well. I stamped the left side in Basic Black with the large flourish from Priceless. Then I adhered the matted butterfly piece on the right and added some Basic Black grosgrain ribbon down the middle. Easy!

Saturday, August 4, 2007

Beate's Weekend Sketch Challenge #13

I haven't done a sketch challenge for awhile, and I really like this card design that Beate chose for this one. Check out the challenge here (there's a prize!).

I absolutely love the Sage Shadow/Blue Bayou combination. I will be using these colours together for awhile (until I get sick of them!). I just think they complement each other so well. Plus, I get to use my new double-stitched ribbon!

I haven't used my Leaf Prints wheel for a long time, and I thought it was about time to break it out again. I started with that, then tried to find a stamp set to go with it. I like the Simply Said set, so I stamped the flowers in Blue Bayou on Very Vanilla cs and coloured them in with Sage Shadow using a blender pen. But it still needed something. So then I stamped the butterflies from Priceless, cut them out and stuck them on with dimensionals. The sentiment is also from Simply Said.

I was quite proud of my card until I looked at Beate's sample! Wow! She is so amazing. Most of you probably have her blog bookmarked, but if you haven't checked it out, go see it! You will be blown away!

Baroque Gel Card

Here's the gel card that I did for my Specialty Card Stamp-a-Stack class before I went on holidays. The one from yesterday was a practice one, and I decided to use this one instead. It showcases the "gel" part of the card better!

I had to use colours that complemented the green gel that I had! (You can use any kind of gel, but this is what we had in the house!) I chose Wild Wasabi (I can't stop using this colour!), Groovy Guava and River Rock as the card base.

I used my Creative Memories (*gasp!*) cutter to cut out the circles in the larger Wasabi and Guava cs, cutting a larger circle in the Guava so you could see the Wasabi border behind it. I stamped the image from Baroque Motifs in Wasabi and Guava on Whisper White cs. The circle accent is stamped in Guava and River Rock and punched out with 1 1/4- and 3/4-inch circle punches. I punched a 1 3/8-inch circle in Wasabi for the back. I put a gold brad through them all and adhered that to the card with a dimensional. The sentiment is from the Simply Said set, and it is stamped in Wasabi.

For the gel part, I filled a 3 x 3" zip top baggie that I got at the dollar store with a little bit of gel and squished it around. Then I taped the gel bag to the back of the Wasabi cardstock with Scotch tape. I attached the gel part of the card to the River Rock base with gold brads since regular adhesive wouldn't hold the weight of the gel.

And there it is! I was a little intimidated by making a gel card at first, but it's surprisingly easy. The hard part is finding a stamp set that will go with the look of a gel card. I know this one is a stretch, but I don't have much other than floral sets right now! I think the Silly Sea Life set would be perfect for this type of card (but, alas, I don't have it!).

Friday, August 3, 2007

Spotlight Gel Card

I'm still trying to decide whether or not I like this card. I made it as a gel card, but I think it would look better with more holes and no gel! Oh well, it was an experiment! Please let me know what you think (be kind!).

I used Wild Wasabi, Purely Pomegranate and Blue Bayou with my In the Spotlight hostess set. I stamped a bunch of images on Whisper White, then cut the Wasabi a bit larger and punched some circles with my 1 1/4- and 3/4-inch punches. I used gold brads to hold it together since the gel bag is heavy and adhesive would pull away. To finish it off, I used some double-stitched Blue Bayou ribbon and added some stamped circles with dimensionals.

I really like the colours and the basic idea of the card, but there's something missing. Not sure what... Maybe a background stamp on the Wasabi cs...

Anyway, thanks for looking! Happy Stamping!

Wednesday, August 1, 2007

More Blog Candy News

I have a few blog candy announcements!

Kristina is giving away some convention goodies on Friday - check out her blog and leave her a comment!

Also, I haven't heard from Amber, so I had random.org pick another number for me. The new winner of the blog candy is number 9: "Wife2TJ".

Wife2TJ's comment is, "My favorite thing about summer is getting to hang out with friends and family."

Please email me your address so I can send you your pouch of cards! (shannon.mcgann@shaw.ca)

Polka Dots Swing Card

Finally - a card! This is another one that I did at my specialty cards stamp-a-stack last week. It's a swing or flip-flop card. Click here for the tutorial.

The tricky part of this card is all the scoring and cutting to get the center cut out just right! Once that part is done, it's very simple!

For this one, I used So Saffron as the base. I used my Petals jumbo wheel with So Saffron ink to lay the background on the base of the card.

For the center part, I used the Polka Dots & Paisley stamp set. The flower is stamped with Bravo Burgundy and Always Artichoke on Whisper White cs. The dots are stamped with So Saffron. I matted this onto Artichoke and Burgundy cs.

On the inside, I did the same thing, but added the greeting. To finish the card, I used Bravo Burgundy narrow grosgrain ribbon.

Holiday Photos

I feel a lot better today. We're back into the swing of things, and I actually got some stamping done! But for now, I'll post some photos of our holiday.

My mom and step-dad live in Winfield, British Columbia (just outside of Kelowna). They have a beautiful view of Okanagan Lake from their balcony. Isn't this gorgeous!?

They also have a great yard. It was perfect for the kids to run around and play in. They had so much fun! We had a great time having water fights to beat the heat. You can kind of see Adam behind Daddy in the pool. He had just splashed Daddy and Noah with a bucket of water!


Grandpa took us all out in the boat on Saturday afternoon. Noah wasn't too sure what to think. He enjoyed the first part of the ride, but he cried the whole way back! What fun. I think he just didn't like being confined, plus he was tired. Adam had a great time. He got to help Grandpa drive the boat!


I love this picture of Ian and Noah. We went to the beach down the road from my mom's house and went swimming in the lake. Noah was a little nervous! That's my mom in the background.