Saturday, August 30, 2008

August Scrapbook Club Layout - Travel Pages

This is the layout we did at our last Scrapbook Club meeting. It's a timeline page, so the photos will go all over along the map line. I used Kraft as a base, then layered some Brocade Blue on it. Then we sliced up some maps* to layer onto the Brocade Blue. I thought this would be a neat idea if you have a map from where you went on vacation - you could use it as part of your scrapbook page.

For the letters, I used marbling technique by stamping the letters (from Big Deal Alphabet) first in Brocade Blue. Then I took a Stampin' Around Wheel (I used Leaf Prints, but it doesn't matter which one you use) and rolled it in Close to Cocoa ink. Then I smeared that on the inked letter stamp and stamped it on some Whisper White cardstock. Finally, I punched it out with my 1 3/8" square punch and layered it on a Kraft square.

The little squares in the corners of the page are actually flaps that lift up so you have more space for journaling. Each one is a 2 x 4" piece of Brocade Blue, scored and folded in half. Then there's a 1 3/8" square-punched piece of map on it, along with a button from Fresh Favorites II that's been tied with some linen thread and attached with a mini glue dot.

*For the maps, I'm a member of the Alberta Motor Association, so I get free maps from them! I just went online and checked off the maps I wanted and they mailed them to me.

Thanks for stopping by today! Have a fabulous long weekend!

Blessings to you,

Friday, August 29, 2008

Stamp and Scrapbook Clubs

I'm gearing up to start my Fall Stamp and Scrapbook Clubs, and I'm really excited this year! I've decided to do something different this year. At the first club meeting of the year, instead of placing an order, the ladies will be making a project for a class fee. We will draw names of hostesses for the year at that meeting, and the first hostess and club order will be in October. This will give the ladies a chance to figure out what they'd like to order, and the first hostess has a chance to collect outside orders if she'd like.

**I still need two more ladies in each club, so if you live in my area and would like to join, please contact me!**

My Stamp Club will be making a Craft Keeper Box ($25) to hold all of the cards in that they make this year. We will be decorating all the inserts at the first meeting. There is even a section on techniques, so they can file away the special techniques they learn! I tried to keep them fairly simple because they will be making all of them in one evening! Here are all of the section cards we will be making:
My Scrapbook Club will be making this Scrapbook Journal ($20) to keep class notes in and to record any other useful scrapbooking information they find in magazines, online, etc. Their journals will have current designer series paper, though!

Thursday, August 28, 2008

A Couple of Journals

Whew! I'm finally resting a bit from my New Catalogue Open House last week. What a fun time! Thank you to everyone who came. I really appreciate your support. A big congratulations to Susan K. who won my grand door prize draw! Susan won the Level 3 Holiday Happenings Bundle, along with some Chocolate Chip and Kiwi Kiss cardstock and ink pads and a one-inch circle punch. And congratulations to Jackie T., who won the Questionnaire prize draw of an embellishment kit and to Kirsten S., who won the Catalogue Scavenger Hunt prize draw of a Scallop Notes Stationery Pack!

I've been madly planning some fall classes, and I decided to do things a bit differently this year. My brilliant SIL, Wendy, came up with the idea of doing a class where you can make some little Christmas gifts for people, so I've come up with a create-your-own class where people can choose four of nine different projects, invite some friends over and everyone will get to make the four items.

The journal and pen set is a classic that I've been making since I started with Stampin' Up!, and I've tried to improve it over time. This is one of the projects you can choose from for the class.

I found a tutorial (I'm afraid I forget where - it was months ago) about how to remove the coils so you can adhere the paper at the edge of the notebook, which looks a lot neater than lining it up by the coils! This is a notebook that I CASEd from sluman on Splitcoast Stampers. I think it was made at Convention. It uses the new Bella Rose designer paper (LOVE IT!) with some Pink Pirouette cardstock, Pretty in Pink grosgrain and a flower from the Pretties kit. I used the new scallop edge punch on the centre strip and poked holes in the scallops with my paper piercer.

For the second notebook, I went with Summer Picnic dsp and added some Bashful Blue grosgrain, a strip of Real Red cardstock and an Old Olive scallop circle punch.

Wednesday, August 20, 2008

Memory Match Game in a Tin

Here's another little craft I made for my fall classes. It's a children's Memory Match card game in a tin. I did not come up with this idea - it was shared at our large downline meeting by Winona Semler (an amazing stamper!).

There are six pairs of cards that I stamped with the animals from Pun Fun and coloured using my Stampin' Write markers. I decorated the tin with Summer Picnic designer series paper. The band that goes around the tin is also decorated with Summer Picnic and coordinating cardstock, and stamped with Schoolbook Serif Alphabet and Define Your Life. I thought it would make a cute stocking stuffer or travel game. You could also make magnet games like Tic Tac Toe since they would stick to the tin!

Well, my New Catalogue Open House is tomorrow and I still have tons to do to get ready for it! I'm very excited - I hope people show up for it! Wish me luck!

Blessings to you,

Monday, August 18, 2008

Baby Mini Photo Book

Another quick post today! DH was away for the weekend on a manly canoe trip, so I've been busy again with kids and my mom visiting and family birthday parties and church! I love it all, but there just aren't enough hours in the day to do everything I want to do. I'm so in awe of you ladies who stamp and post and visit all your blog friends every day! How do you do it? Where do you find the time!? (Seriously, I need to know! LOL!)

Anyway, this is one of the projects I'm planning for my fall classes. It's a mini photo book (I posted a tutorial previously here). For this one, I used Bashful Blue, Almost Amethyst and Barely Banana cardstock with some Bashful Blue Prints paper (I know it's retired, but I figure it's close enough to the new Patterns paper). The stamp sets are Nursery Necessities and Taffy Alphabet.
Thanks for stopping by!

Blessings to you,

Friday, August 15, 2008

Sour Cream Containers and some Rambling!

I was thinking this week that being a stay-at-home mom would be so much easier if the kids weren't here! Imagine all the work and stamping I could get done if I didn't have to take care of children! LOL!

So this week, I have been madly preparing for my New Catalogue Open House (this Thursday, August 21 if you're in my area!), my downline meeting (last night), my Scrapbooking Club (on Monday), my fall classes, etc. in between family excursions and playing outside in the gorgeous hot weather we're enjoying here (you have to take it while it lasts here in Alberta!)

I haven't been at my computer much with all this going on, so I just thought I'd do a quick post to show a fabulous, quick and easy (what else!?) project I've made to use up my scrap designer series paper that has retired. Sour cream containers!!
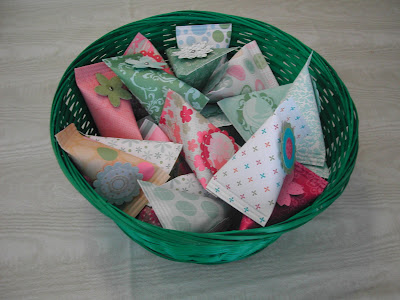
If you haven't tried these yet, they are so fabulous. Beate gives a great tutorial on Splitcoast Stampers. I made these for my Mystery Hostess Gifts. There is a slip of paper inside each one that has a different Stampin' Up! catalogue item in it, ranging from a Stampin' Write marker to a Pretties Kit. When a hostess books a workshop, she can choose one of these containers, and at her workshop, we will add it to her order as her free booking gift (that way her workshop sales are that much higher).

I made them really simple because I was making so many of them. To decorate them, I either added a scallop circle and 1 3/8" circle of designer paper or two 5-Petal pieces of designer paper held together with a brad. These were attached with dimensionals. Here are a few of them:Thanks for reading! I'm such a bad blogger... I haven't been visiting my friends very much this summer. After my open house, I'll have some time to get back. Please be patient with me!

Blessings to you,

Sunday, August 10, 2008

Thank You, Denise!

Denise at Stamping Vacation sent me this fabulous RAK for her Pick Three Challenge! The blog candy was just supposed to be the stamps, but she threw in some CB'd cardstock and some Bella images (I love them!). Plus, look at the amazing card she made as well. Isn't that cute? I love the bright summery colours! Denise has her current Pick Three Challenge up right now, so check it out! It's lots of fun.

Thank you so much, Denise! I can't wait to use all this stuff!

Blessings to you,

Tuesday, August 5, 2008

More Circle Cards (Using Up My In Colors!)

I had so much fun making circle cards for Tamara's Sketch #54 that I had to make more! Plus, I have tons of In Color paper left that I need to use up before it's retired.

I made these cards for the people in my Birthday Club for August (my customers sign up for the Birthday Club, and when it's their birthday month, I send them a card that I don't write in so they can reuse it, plus they get some special birthday coupons).

I used the Scallop Circle Cards that I have left from the Mini Catalogue, along with some Afternoon Tea designer series paper, layered with Wild Wasabi or Chocolate Chip. For the image, I stamped the butterfly from Priceless on a rectangle of Whisper White, then stamped it again on some scrap paper, cut it out and adhered it with a dimensional for a 3-D look. I used my paper piercer to make some crazy lines and faux-stitched with my Chocolate Chip and Bashful Blue Stampin' Write Markers. Then I tied some linen thread around it, tied a Soft Subtles button through, and adhered it with a mini glue dot.

These were quick and easy to make a whole bunch of! I hope there are some more Scallop Circle cards in the new catalogue!

Thanks for reading!

Blessings to you,

Sunday, August 3, 2008

Barely Gray

We're currently on vacation (yes, again!), visiting my mom in B. C. It really is nice to be married to a teacher and have the summer off! We'll be back in a few days, and then I'll visit all my blog friends to see what you've been up to! In the meantime, here's a card I made last week:
For this card, I combined a couple of challenges - I used a sketch from Card Positioning Systems and an altered Splitcoast Colour Challenge 151 (I used Barely Banana instead of Yoyo Yellow with Going Gray and Basic Gray). The trend right now seems to be to use gray, so I guess I'll have to stock up!

It's pretty straight-forward. I used Going Gray as my base. The stamps are all from my recently acquired Best Kind of Friend set, stamped in Basic Gray. I stamped off the little flowers before stamping on the Banana square. I used Very Vanilla taffeta ribbon because I don't have any Basic Gray (which I will be purchasing!). I finished it off with a couple of silver brads.

I also made a version with silver embossed flowers, but I think I like the plain one better. What do you think?
Blessings to you,