Monday, November 22, 2010

November Scrapbook Club Layout

Nothing like leaving things until the last minute!  My Scrapbook Club is meeting tonight, and I just finished figuring out our layout!  The ladies fell in love with the layout on p. 35 of the Idea Book & Catalogue, so I tried to adapt it to make it more conducive to a club (i.e. affordable supplies and quantities!) and add a second page to it, and this is what I came up with.
 I love the combination of Crumb Cake, Certainly Celery, Wild Wasabi and Early Espresso!  I never would have thought to use them together, but it's really striking.  

Anyway, hopefully the ladies like it!

Blessings to you,

Monday, November 8, 2010

November Stamp Club Projects

I have found the cutest Christmas projects for this month's stamp clubs!  I will admit they are all CASEd because they are too adorable not to reproduce!
This gorgeous vintage Christmas card was created by Sherry Roth.  It uses the Deck the Halls designer paper, champagne glass glitter, tinsel, gold waffle paper (so many fun embellishments from the Holiday Mini Catalogue!). 

Kimberly Van Diepen (could she be any more talented!?) posted a fabulous tutorial on her blog about how to make these treat cone decorations, so I came up with a Christmas version using the Jolly Holiday designer series paper.
This cute Christmas card was on a display board at a Stampin' Up! event I attended, so I'm not sure who came up with it, but don't you love the little presents made with the petal card punch!?  I punched out the "gifts", then ran them through the Big Shot in the polka dot embossing folder.

The tree branches are the evergreen tree stamp from Lovely as a Tree (is there anything you can't use that stamp set for?).

I'm so looking forward to Stamp Club tonight and next week!  I have such lovely ladies in my clubs again this year!

Thanks for stopping by.

Blessings to you,

Sunday, October 24, 2010

October Scrapbook Club Layout

This is the layout my Scrapbook Club ladies will be making tomorrow! I love this colour combination for Halloween (Rich Razzleberry, Old Olive, Pumpkin Pie, Basic Black).

I thought it would be fun to use an assortment of 4 x 4 square mats on this one.  I sponged Basic Black ink around all the solid colour pieces.  The spider web is made with black waffle paper and the spider web embossing folder (with the Big Shot, of course!).  I also added some little bats from the Bitty Bat punch.  The tag has a piece of Raven lace ribbon attached.  I think in hindsight the the pumpkin piece should be angled as well, so I think I'll change that for the class!

I did CASE it from someone - I actually saw it on Kijiji from someone who was selling a kit to make a similar page, but I'm not sure who (no name on the image). 

Thanks for stopping by today,

Blessings to you,

Sunday, October 10, 2010

Happy Halloween!

  
I loved the layout of the card on page 10 of the Holiday Mini Catalogue, so I CASEd it!  

I embossed the black waffle paper and Old Olive card with the new Spider Web textured impressions folder using my Big Shot.  I love how the waffle paper looks!  It's layered on Rich Razzleberry and edged with Raven lace trim.  
I stamped the pumpkins from Autumn Harvest in Basic Black on Pumpkin Pie cardstock (I masked the little pumpkin to get the big one to overlap).  Then I used my blender pen to add some Pumpkin Pie ink to the lines on the pumpkins for more texture before cutting them out.
To finish, I added a few bats from my Bitty Bat punch and a Halloween greeting.  My Stamp Club will be making this card this month, along with a couple other cute projects!

Blessings to you,

Tuesday, October 5, 2010

Bells & Boughs

This is a card I made for a swap I'm participating in featuring new accessories.

I am so loving this new Deck the Halls designer series paper from the Holiday Mini Catalogue!  I pulled colours out of the paper to complete this card - Cherry Cobbler, Always Artichoke and Crumb Cake.  I started by sponging all the layers with Crumb Cake ink to add texture.  The Crumb Cake layer is punched with the Scallop Border punch.

I stamped the bells from Bells & Boughs in Crumb Cake ink, then used my blender pens to lightly colour it in with Artichoke, Cherry and Crumb Cake before punching it out with the 1 3/4" circle punch. 

I tied some Cherry Cobbler seam binding around the whole thing and threaded it through a jumbo button (these are fantastic!) before tying a big bow.  To finish, I added a Merry Christmas (from Teeny Tiny Wishes), punched it out with the Word Window punch and layered it on a piece of Always Artichoke punched from the Modern Label punch.

I think I'll be using a lot of Cherry Cobbler in my Christmas cards this year! It's gorgeous!

Blessings to you,

Saturday, September 25, 2010

Artistic Christmas

 It has been a busy month, so I apologize for not posting sooner.  We moved into our new house (finally!) at the end of August, so it's been a flurry of unpacking, preparing for my fall classes and clubs, getting the boys ready for school, etc.  So here's a quick post of a card I made this summer.
This is a card I CASEd from Felice Gladue for our WeCanStamp Stampin' Up! demonstrator event.  I was one of the make & take presenters, so everyone got to make this card! 

I love it when you can use a stamp set in more than one way, and I was thrilled that Felice used the Artistic Etchings set to make Christmas ornaments!  How cute is that? 

The circles are stamped in Cherry Cobbler, then stamped again on scrap cardstock.  I punched out the centers of the scrap circles with the 1" circle punch and adhered those to the main circles with dimensionals.  The ornament "handles" are stamped in Always Artichoke. 

To finish, we added some Early Espresso 1/8" taffeta bows and pearl jewels.  My stamp clubs will also be making this card this month!

Thanks for stopping by!

Blessings to you,

Wednesday, August 4, 2010

August Stamp Club Cards

I am so fortunate to have had lots of ladies sign up for clubs this past year, and one of my clubs is actually going through the summer.  This is our last meeting as this group, and I came up with some special cards for them.
This first card uses the Iris Twist technique.  I used the gorgeous new Woodland Walk designer series paper and pulled my colours from there.  I am so happy that Wild Wasabi is back! It looks so nice with the Chocolate Chip.  The stamp is from the Cute by the Inch level 2 hostess set, which I inked using my Stampin' Write markers.

The second project is the card purse, which is also found on Splitcoast Stampers.  I used the new Celebrations designer series paper and Party This Way stamp set with Pacific Point, Pear Pizzazz, Real Red and Bashful Blue.  For embellishments, I used Certainly Celery satin ribbon and Brights buttons.


As soon as I saw the Smooch Spritz Resist technique on Splitcoast, I had to try it!  I did CASE the sample card by Lydia Fiedler.The card base is Whisper White, embossed with the Vintage Wallpaper embossing folder and the Big Shot.  I cut a scallop circle of Presto Patterns designer series paper and sponged Pacific Point ink all over it.  The I spritzed it with Gold Glow Smooch Spritz and sponged that as well.  To finish the card, I added a Scallop Oval greeting with a clip tied with Whisper White organdy ribbon.

Sunday, August 1, 2010

Sparkly Christmas Ornaments!

This is my second card for the Christmas in July One Layer Card swap. 
I started with a Bravo Burgundy base and embossed the greeting from Contempo Christmas in gold embossing powder.  Then I sprayed the card with gold Smooch Spritz.  I stamped the ornament pieces using the rock and roll technique with More Mustard and Bravo Burgundy ink before punching them out with the Ornament punch.  I then put a little yellow rhinestone circle brad through the center ornament and added Dazzling Diamonds glitter to all three ornaments before attaching them to the card with Stampin' Dimensionals.  It looks a lot more sparkly and glittery in real life!

Blessings to you,

Friday, July 30, 2010

Come to Bethlehem!

I signed up for a Christmas in July swap where we are only supposed to use the new Christmas sets.  I signed up excitedly for two spots, thinking it would be easy.  The trick is that it's a One Layer Card swap!  It sounded simple, but it's much harder than I thought it would be to come up with a nice card that only has one layer (that layer being the card base!).

So for this card, I CASEd this card by Allee.  She used some layers, but I adapted it to be just the card base!

I used masking, brayering and sponging for this card.  I stamped the images from Come to Bethlehem in VersaMark on the Whisper White card, then embossed with silver embossing powder.  Then I tore some scrap paper to have a curved edge and used it to cover the bottom portion of the card.  I then brayered Marina Mist ink across the top portion.  After that, I moved the mask down a bit and sponged some Sahara Sand ink across the top.  I kept moving the paper down and sponging more ink to give a sand dune effect.  Finally, to finish off the card, I tied some Whisper White organdy ribbon around it.

I'm pretty happy with how this card turned out.  Hopefully the ladies in the swap will like it too!

Blessings to you,

Sunday, July 25, 2010

July Scrapbook Club Layout

It's our final Scrapbook Club meeting of the year.  What a fun group of ladies this group is!  I'm so glad many of them are returning again in the fall!

For our final layout, we'll be making these kids' birthday pages.  I was very excited to see the Celebrations collection in the new Idea Book & Catalogue, so I went to town ordering the designer series paper, buttons, stamp set, anything I could get in these colours (Pacific Point, Bashful Blue, Pear Pizzazz, Real Red)!

Here`s the recipe:
Stamps:Party This Way
Paper: Celebrations designer series paper, Real Red, Bashful Blue, Whisper White
Ink: Pacific Point, Real Red, Pear Pizzazz
Embellishments: Candles Builder Wheel, Brights buttons, Bashful Blue 1/4" grosgrain, Naturallly Serif decorative strip die with Big Shot

Thanks for stopping by today!

Blessings to you,

Friday, July 16, 2010

Ooh Baby!

This is a card I CASEd from Christy Harsch.  I love the simplicity.  It uses the Baby Bundle stamp set - stamped the little images in Basic Black.  Then I used sponge daubers to add dots of ink over the stamped images (Melon Mambo, Marina Mist, Certainly Celery and Daffodil Delight).  To finish off, I tied some Celery satin ribbon around the card and added a layered piece with the sentiment.

Super quick and easy!  My favourite kind of card!

On a personal note, we got the move-in date for our house, finally!  On August 24, we will officially have our new house!  I will be so happy to be out of this apartment!  So now I'm going to get to work planning my New Catalogue Open House (better late than never!).

Blessings to you,

Sunday, July 11, 2010

July Stamp Club Cards

I am thrilled to have enough ladies in my Stamp Clubs that we can meet over the summer, although this is the last meeting for my Monday night club. I've had a great year with these ladies!  I'll be showcasing lots of our new catalogue products and colours at this month's clubs.

This first card uses a combination of techniques - I learned it from a very talented lady, Lynne Scratch.  It combines the bouncing brayer and dazzling diamond dust techniques, along with embossing with the Big Shot.

I used the Manhattan Flowers embossing folder to make the flowers in Whisper White, then used two brayers to apply Marina Mist and Elegant Eggplant ink randomly on the flowers.  Then I cut around the edges of the flowers, applied VersaMark to the whole piece and heat embossed it with Iridescent Ice embossing powder. 

To finish off the card, I adhered the flower piece to a Marina Mist (LOVE this colour!) card base, wrapped some Marina Mist 1/8" Taffeta ribbon around it and added a sentiment.

This second card is one I made for my sister-in-law, Wendy's, workshop this afternoon, but I thought it would be a great Stamp Club card because it uses all the new In Colors!

I used the new Level 1 hostess set Because I Care with my In Color Stampin' Write markers.  I coloured the different colours on the flower part of the stamp and Pear Pizzazz on the stem and leaf before stamping on Whisper White.  I then sprayed this piece with Vanilla Shimmer Smooch Spritz to give it a soft, shimmery look.

To finish off, I matted the flower piece on some Pear Pizzazz and Concord Crush cardstock, wrapped some Certainly Celery 5/8" grosgrain around it and adhered it to the Blushing Bride card base.  The sentiment is stamped in Blushing Bride and Concord Crush.

The final card is a Gate Fold card that I made using the new Greenhouse Gala designer series paper.  I pulled the colours from the paper - Pear Pizzazz, Baja Breeze, Early Espresso.  The stamp set is Awash With Flowers.
I'm looking forward to tomorrow and Tuesday night Stamp Clubs!  Thanks for reading!

Blessings to you,

Tuesday, July 6, 2010

Greenhouse Gala Butterfly

This is a card I made for a swap I'm in with my upline's group.  We had to use new catalogue items.  I can't wait to see what the other ladies came up with!
It's pretty straight-forward!  Here's the recipe:

Stamps: Artistic Etchings
Paper: Greenhouse Gala dsp; Early Espresso, Whisper White, Pear Pizzazz, Daffodil Delight cardstock
Ink: Early Espresso
Accessories: Punches (Eyelet border, Modern Label, Word Window), Big Shot Beautiful Butterflies Bigz die, Vintage Wallpaper embossing folder, crimper, Vintage brads, Early Espresso 1/8" taffeta ribbon

I ran the Daffodil cardstock through the Big Shot with the Vintage Wallpaper embossing folder, then rubbed the Early Espresso ink pad over it.  I also sponged Espresso ink around the butterfly wings.  For the Whisper White layer, I punched it with the Eyelet border punch, then ran it through the paper crimper.

Thanks for reading today!

Blessings to you,

Wednesday, June 30, 2010

Blossom Spread!

Before I begin, just a reminder that today is the last day to order out of the current SU! Idea Book & Catalogue!  Check my website for the retiring list, and you can order right from there if you'd like - just click "Shop Now" at the top right of the page (or contact me to order).

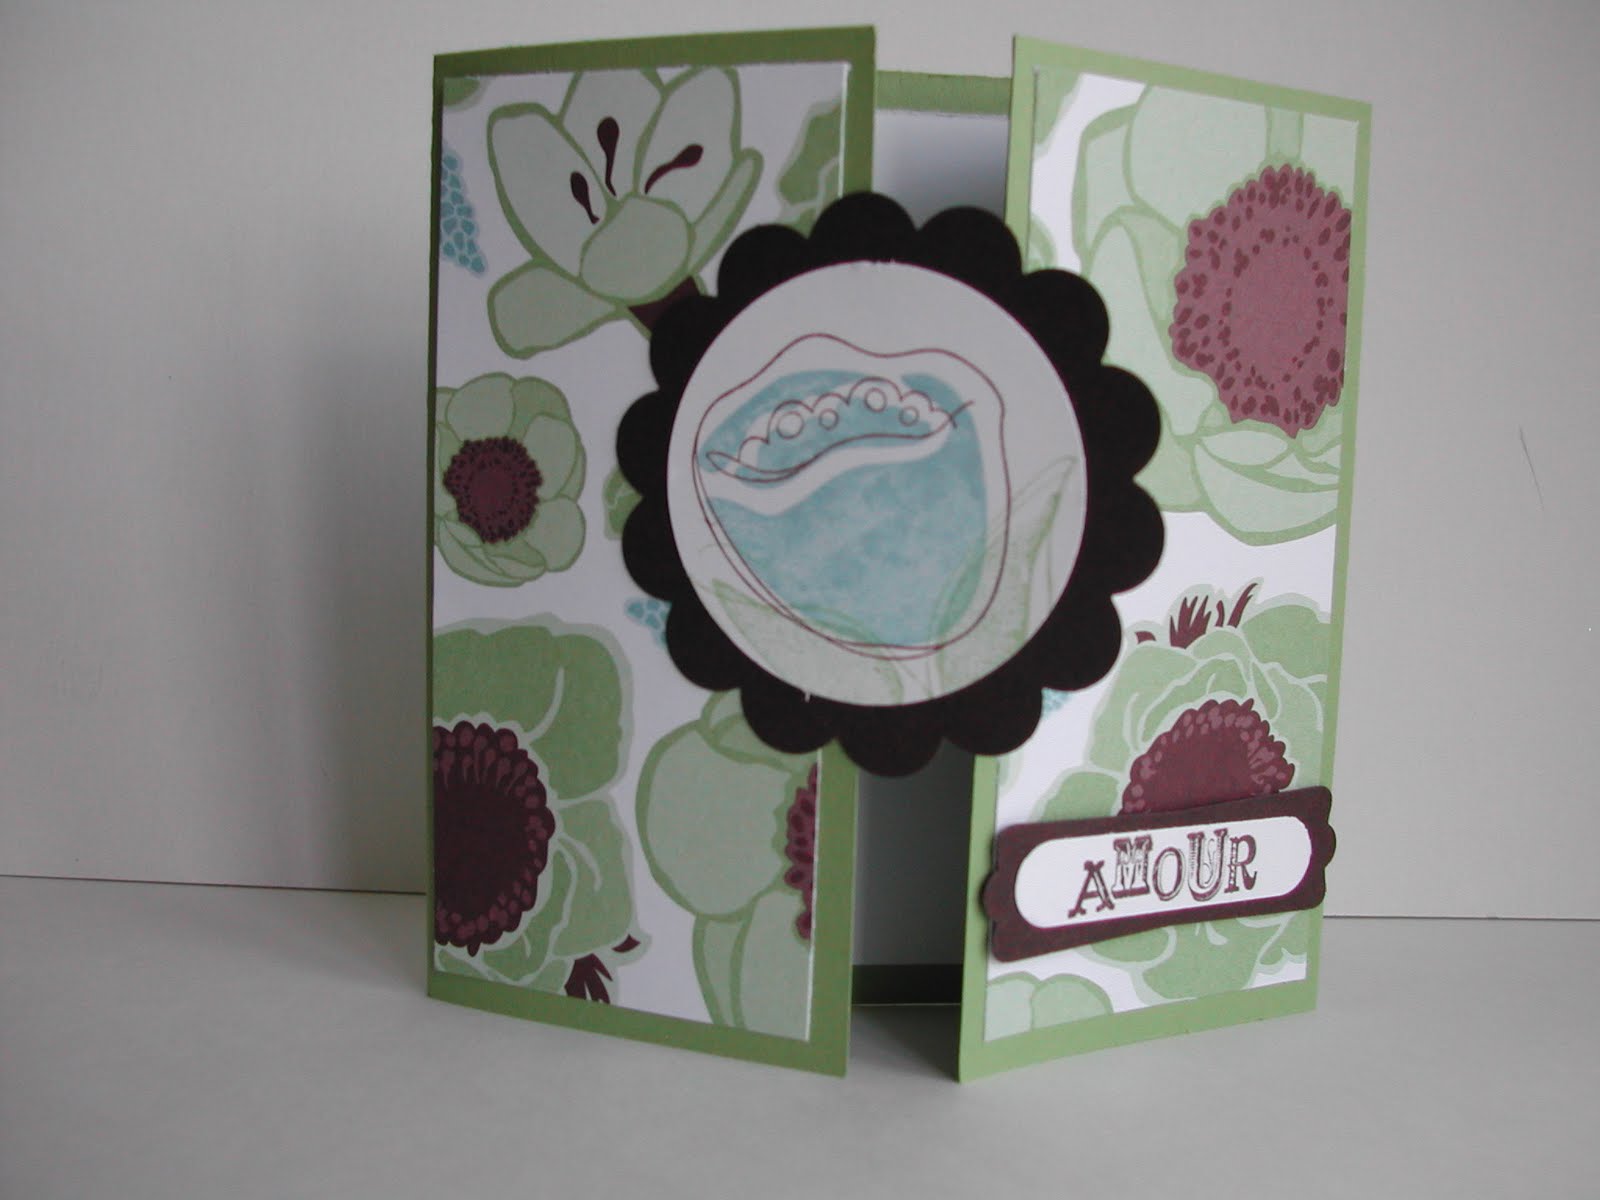
Now, onto the card!  This card uses the re-inker spread technique that I've seen on a few blogs.  My Stamp Club used this technique this month to create pansies using the butterfly punch (I'll post that soon!).
This card uses one of my favourite retiring colour - Pixie Pink!   I also mixed in some Certainly Celery and Perfect Plum. 

For the re-inker spread technique, here are the steps:
1. Punch your shape (large flower blossom here) out of Shimmery White cardstock.
2. Spritz the shape with LOTS of water (for this technique, the more water the better!).
3.  Place a few drops of re-inker on a plate (or I used an empty SU! button container).  Use your aqua-painter to pick up some re-inker.
4.  Touch the inked aqua-painter to the wet flower while squeezing it at the same time so the ink "flows" onto the flower.  Allow it to dry (you can use your heat tool to speed up the process) and finish your card.

To finish the card, I added some 1/2" circles and little flowers from the Itty Bitty punches, along with some Itty Bitty buttons to the flower centers.  I embossed the Certainly Celery piece with the Square Lattice embossing folder and wrapped some twill ribbon around it.  I stamped the ribbon in Pixie Pink and Perfect Plum with the Itty Bitty Bits stamp set.

The cool thing is that the flowers are shimmery after the ink dries because of the Shimmery White cardstock - very pretty in real life! 

My goal this summer, since my husband is home (he's a teacher, so it works very nicely for holidays!), is to post to my blog at least once a week!  I know I've been a bad blogger, so I'm hoping to get back into it now that I'll have a bit more free time!  Now if I can just stay off Facebook, I'll be fine! :)

Thanks for stopping by! 

Blessings to you,

Thursday, June 24, 2010

June Scrapbook Club Layout

My Scrapbook Club ladies wanted to play with the Smooch Spritz and Presto Patterns designer series paper this month, so we thought a wedding layout would be perfect!  I wanted to keep the page pretty neutral since everyone's wedding colours are different, so I decided to use Whisper White and Very Vanilla as the base colours, with a splash of gold (or silver if they choose). 
I apologize for the photo quality - the lighting in our apartment isn't that great!  It looks a lot better in real life - very shimmery and elegant!  (I can't wait to move into our new house!)

Anyway, I started with Whisper White as the base, and I cut some strips of Presto Patterns and sponged them with Blush Blossom ink (I thought the ladies could sponge their wedding colour ink instead if they wanted to tie it in with their photos).  Then there is a strip of Vanilla with a Brushed Gold border (punched with the eyelet border punch).  I used the Beautiful Butterflies die with my Big Shot to cut the butterfly out of Whisper White, then embossed the flourish stamp from Elements of Style in gold embossing powder on it. Then I sprayed it with Vanilla Smooch Spritz.  A creamy half-pearl from the Pretties kit finished the butterfly.

The title is from the "Peace, Love, Joy" decorative strip die with the Big Shot - I just cut the word "Love" out of it (in Brushed Gold cardstock).  I hung a Vintage Tag on it with the date of my wedding on it.  The tag is cut from Whisper White with the scallop border corner punch for the corners.  I sprayed it with the gold Smooch Spritz and added a knot of Organdy ribbon at the top.

Should be a fun evening with the ladies!  I'm really enjoying my Scrapbook Club this year!  Such a fun group of ladies! 

Blessings to you,

Monday, May 31, 2010

Soft Suede & Smooch Spritz!

This is one of the cards we did as a make & take at my downline meeting.  I wanted to play with some of the new Summer Mini stuff, so here's what I came up with.

I used the new Presto Patterns designer paper and sprayed it with Log Cabin Smooch Spritz.  How much do you love this pre-embossed paper?  It dried surprisingly fast, and then I dabbed the excess off with a paper towel.

Then I stamped some flourished from the Elements of Style set in Soft Suede along the bottom.  To finish it off, I layered it on some Barely Banana cardstock, stamped some more flourishes and a sentiment from Great Friend, all in Soft Suede.  I tied some Suede polka dot ribbon around the whole thing and adhered it to the Suede card base.

Et voila!  I'll be making this card at my summer workshops to show off the Summer Mini products.

Thanks for reading!


Blessings to you,

Sunday, May 23, 2010

Manhattan Blues

I made this card for a swap I'm doing with my downline.
I really wanted to use the Manhattan flower embossing folder with vellum cardstock, but it took awhile to figure out what to do with it after!  I decided to use Basic Gray and Bashful Blue.  I haven't used this colour combination before, but I love it!

I made the scallop square with the Scallop Border and Scallop Corner punches (see Gretchen Baron's blog for a fantastic tutorial on all the sizing of different squares for this technique).  I punched the corners with the Horizontal Slot punch and tucked the vellum piece in those (I didn't want the adhesive to show through, so I put it on the corners on the back side after they were tucked in).

Then I layered it on some Bashful Blue wrapped with Gray Taffeta ribbon and stamped the greeting in Basic Gray.

Hopefully they'll like it!

Blessings to you,

Wednesday, May 19, 2010

May Scrapbook Club Layout

I wanted to use the new Island Oasis designer paper from the Summer Mini Catalogue for my Scrapbook Club this month, and I really wanted to try a shimmer paint technique with the Sweet Scoops stamp set, so I combined the two for this layout (I CASEd the layout from someone, but I'm afraid I can't find the original now.)
So, for the ice cream stamps, we will be mixing some white shimmer paint with reinkers and painting that on the stamp before stamping (I didn't do that for the sample for the sake of time, but we will be doing it at the club!). 

Blessings to you,

Sunday, May 16, 2010

Giraffe Baby!

I made this baby card as a sample for one of my friend's baby shower invitations.  She likes the Earth Elements colours, so I chose Chocolate Chip, Not Quite Navy and Certainly Celery for this one.

I used the new Square Lattice embossing folder for the background.  I love the "quilted" look for  baby card.  And of course, I had to use Itty Bitty Buttons!  It IS a baby card, after all! 

The giraffe is from Wild About You, which I know is retired, but it's so cute!

Just a quick post for today!   Thanks for stopping by!

Blessings to you,

Friday, May 7, 2010

May Stamp Club Cards

Yay! I managed to get my Stamp Club cards planned!  I apologize for the quality of the photos.  I can't get decent light in my apartment! 

I wanted to showcase a lot of the new products from the Summer Mini Catalogue, so here's what we'll be making this month.
I CASEd this card by Nancy Littrell.  I've been wanting to do watercolouring with my clubs for quite some time, and when I saw this Elements of Style set in the mini catalogue, I knew it was perfect!  I first cut some watercolour paper with the Top Note Bigz die, then stamped the flower image in black Staz-On on it.  I used the Rich Regals watercolour crayons and my aquapainter to colour in the flowers.  I then spritzed the image with Vanilla Smooch Spritz.  LOVE this stuff!  To finish off the card, I added some Basic Black satin ribbon and matted the coloured piece on Ballet Blue cardstock.
 This second card uses the new Builder Wheels!  These are so cool!  I inked the triple cell cartridge with Pretty in Pink, Tempting Turquoise and Certainly Celery ink and rolled the wheel across.  I thought the Sweet Scoops stamp set went really well with these wheels as well, so I added a scoop of Pretty in Pink and some Tempting Turquoise sprinkles.
 This final project is something I learned at our WeCanStamp group meeting last month.  I thought it was so cute!  I ran a 3 x 3 envelope through the Big Shot with the new Square Lattice embossing folder (make sure the envelope flap is open).  Then I punched a scallop circle out of the envelope (through both sides).  I cut a 2 3/4" square of Pixie Pink cardstock and I put it in a small cellophane bag that I cut the top off of so it was three inches long.  This whole thing fits in the envelope.  I stamped the "for you" sentiment from the Elements of Style set in white Staz-On on the cello bag.  And because it's a small envelope, the Itty Bitty Bits stamp set, Bitty Buttons and Punch Pack all work perfectly with it!  I layered those as an accent, then stamped the sentiment from Teeny Tiny Wishes in Lovely Lilac.

There are so many more Summer Mini products I wanted to use, but I guess they'll have to wait until next month!

Blessings to you,

Wednesday, May 5, 2010

Manhattan Birthday

Well, we're finally moved out of our house and are renting a condo until our new house is built.  It's a long story, so if you're interested, you can check out my post on my family blog here.

Anyway, I know I haven't posted for awhile.  It's been a crazy month!  I found a photo of this card I made for my mother-in-law for her birthday, so I thought I'd share that!

 I know I CASEd this from somebody, but I'm afraid it was so long ago, I can't remember where I found it or who I copied.  If you know, please let me know so I can give credit where credit is due!

I used the Manhattan Flower embossing folder with vellum cardstock for the main image, placing it behind a piece of Rose Red textured cardstock with a square cut out of it.

A felt flower with a Chocolate Chip corduroy button and 5/8" grosgrain ribbon complete the card. 

I will be planning my Stamp Club projects this week, so I'll post those as soon as they're ready.

Thanks for stopping by today!

Blessings to you,

Monday, April 19, 2010

April Scrapbook Club Layout

So this morning I remembered that I hadn't yet planned for my April Scrapbook Club, which meets tonight!  So in all the packing and mess of my house, I did the mad scramble to get it together!

I decided that the smartest thing to do would be to CASE someone else.  So I found this lovely Spring layout by "martat" on Splitcoast Stampers.  Here's my take on it (which is not very far off from the original!).

I love all the flowers!  It uses the Shades of Spring designer series paper from the Occasions mini catalogue (only available until the end of this month!) and I used the Blossom Party and Build a Flower dies with my Big Shot to make all the flowers (thanks, Treena, for loaning me your dies!).

The title is stamped with Lovely Letters in Orchid Opulence, and I added some Whisper White Organdy ribbon around the title piece.

I hope the ladies like it!

Blessings to you,