As I mentioned a few weeks ago, my Stamp Club ladies had a "CASEd from the Catalogue" theme this month. One of the items we copied was the flower featured on p. 99 of the catalogue. Well, as I was looking at the flower, I thought we needed to do something with it. It would be cute as a decoration in a plant or for a party favour, but with only one of them, my ladies needed a card! So I added it as an embellishment to a card and here's what we made:
I used Rich Razzleberry as the card base and accents (from the Brights designer series paper stack). The white piece is embossed with our new Argyle embossing folder. The sentiment is stamped from Itty Bitty Banners and cut out with the Bitty Banners framelits dies. I adhered the flower to the card with mini glue dots (those little suckers are strong!).
Here's the flower before it was made into a card, as posted previously here:
I'm gearing up for Christmas now, so you'll be seeing lots of holiday ideas in the coming weeks!
Blessings to you,
Friday, October 19, 2012
Friday, October 12, 2012
Peaceful Snowflakes
I've been spending a lot of time this week preparing cards for my upcoming Christmas stamp-a-stacks. I try every year to have an assortment of cards ready, and my hostesses get to choose four of them for her and her guests to make at their event (they make five of each card).
This one is one I came up with using the new Snowflake Soiree stamp set.
I try to keep the cards simple but pretty for stamp-a-stacks since they will be making so many card, and I don't want it to take hours and hours to finish! So this one is simply the snowflakes stamped in Marina Mist, Midnight Muse and Wisteria Wonder on some Shimmery White cardstock. The sentiment is from Greetings of the Season, stamped in Midnight Muse. The card itself is Midnight Muse with a layer of Wisteria Wonder under the stamped portion. To finish it off, I added a couple of rhinestone jewels.
Blessings to you,
This one is one I came up with using the new Snowflake Soiree stamp set.
I try to keep the cards simple but pretty for stamp-a-stacks since they will be making so many card, and I don't want it to take hours and hours to finish! So this one is simply the snowflakes stamped in Marina Mist, Midnight Muse and Wisteria Wonder on some Shimmery White cardstock. The sentiment is from Greetings of the Season, stamped in Midnight Muse. The card itself is Midnight Muse with a layer of Wisteria Wonder under the stamped portion. To finish it off, I added a couple of rhinestone jewels.
Blessings to you,
Monday, October 8, 2012
Hilton Head Island
Thanks to my wonderful customers and my amazing downline, I was one of thirty Canadian demonstrators who earned a weekend getaway to Hilton Head Island, South Carolina from Stampin' Up! My husband and I enjoyed four relaxing days last weekend at the Westin Resort and Spa on the island. I had never heard of Hilton Head Island before I earned this trip, and I was pleasantly surprised when we arrived. What a beautiful place!
This first photo was taken from the airplane as we landed in Savannah, Georgia. I just loved how the sunlight came through the clouds, and you can see the lush trees below. In Savannah, a shuttle picked us up to take us on the short trip to the hotel on Hilton Head Island.
This photo of the beach from our hotel was taken when we arrived Thursday evening.
On Friday, we took a shuttle from the hotel to Shelter Cove Marina, where we walked along the boardwalk, shopped at touristy boutiques and enjoyed the beautiful weather.
We also enjoyed walking along the beach. There are miles of soft, white sandy beaches here!
These are five of the six ladies in our downline group who earned the trip!
On Saturday morning, my friend, Donna, and her husband, Dan, who had rented a vehicle, drove us to Harbour Head so we could see the lighthouse there. It was another beautiful morning!
Saturday afternoon, we spent bike riding around the island. Stampin' Up! had rented bikes for us to sign out and use, complete with a Stampin' Up! flag on the back, which we got to take home after! The island has bike paths everywhere, so it is very bike-friendly.
On Saturday night, Ian and I dressed up a bit and enjoyed a nice dinner at one of the hotel's restaurants. You can see how curly my hair got because of the humidity!
Every evening, Stampin' Up! left a "pillow gift" for us in our rooms. The first night, we got a beach tote, the second, there was a fruit & cheese platter with fancy water bottles waiting for us, and the third night we received a storage container filled with a stamp set, designer series paper, ribbon, ink pads and embellishments (that was the best one)!
On Sunday morning, we went for a nice breakfast, walked along the beach one last time, and took a few photos outside the hotel (this one is at the fountain in the courtyard). Then it was off to the airport for our flight home.
It was a wonderful trip, and my husband and I enjoyed having some time together without the kids (my mom was kind enough to come out from B.C. and stay with our boys while we went on the trip). So thank you to my loyal customers, my hard-working downline and Stampin' Up! for a trip we will never forget.
Blessings to you,
This first photo was taken from the airplane as we landed in Savannah, Georgia. I just loved how the sunlight came through the clouds, and you can see the lush trees below. In Savannah, a shuttle picked us up to take us on the short trip to the hotel on Hilton Head Island.
This photo of the beach from our hotel was taken when we arrived Thursday evening.
On Friday, we took a shuttle from the hotel to Shelter Cove Marina, where we walked along the boardwalk, shopped at touristy boutiques and enjoyed the beautiful weather.
We also enjoyed walking along the beach. There are miles of soft, white sandy beaches here!
These are five of the six ladies in our downline group who earned the trip!
On Saturday morning, my friend, Donna, and her husband, Dan, who had rented a vehicle, drove us to Harbour Head so we could see the lighthouse there. It was another beautiful morning!
Saturday afternoon, we spent bike riding around the island. Stampin' Up! had rented bikes for us to sign out and use, complete with a Stampin' Up! flag on the back, which we got to take home after! The island has bike paths everywhere, so it is very bike-friendly.
On Saturday night, Ian and I dressed up a bit and enjoyed a nice dinner at one of the hotel's restaurants. You can see how curly my hair got because of the humidity!
Every evening, Stampin' Up! left a "pillow gift" for us in our rooms. The first night, we got a beach tote, the second, there was a fruit & cheese platter with fancy water bottles waiting for us, and the third night we received a storage container filled with a stamp set, designer series paper, ribbon, ink pads and embellishments (that was the best one)!
On Sunday morning, we went for a nice breakfast, walked along the beach one last time, and took a few photos outside the hotel (this one is at the fountain in the courtyard). Then it was off to the airport for our flight home.
It was a wonderful trip, and my husband and I enjoyed having some time together without the kids (my mom was kind enough to come out from B.C. and stay with our boys while we went on the trip). So thank you to my loyal customers, my hard-working downline and Stampin' Up! for a trip we will never forget.
Blessings to you,
Friday, October 5, 2012
October Stamp Club Cards
I'm entitling this month's club theme "CASEd From the Catalogue"! I had some requests for catalogue samples, and I found a few that I liked as well, so I figured why not show how easy it is to replicate the catalogue projects.
This first card is a CASE of the card on page 31 of the Holiday Catalogue. I used the You Are Loved set instead of Tweet Leaves. The colours are Cajun Craze, Pool Party, Lucky Limeade, More Mustard and Early Espresso.
Of course, we have to do a little Halloween treat, so I used the Ghoulish Googlies designer kit and copied the sample on p. 27 of the Holiday Catalogue. I added one of the round tags as a bag topper, just folding it over the top of the glassine bag and stapling it. The oval tag covers the staple. (It's filled with gummy pumpkins - my favourite!)
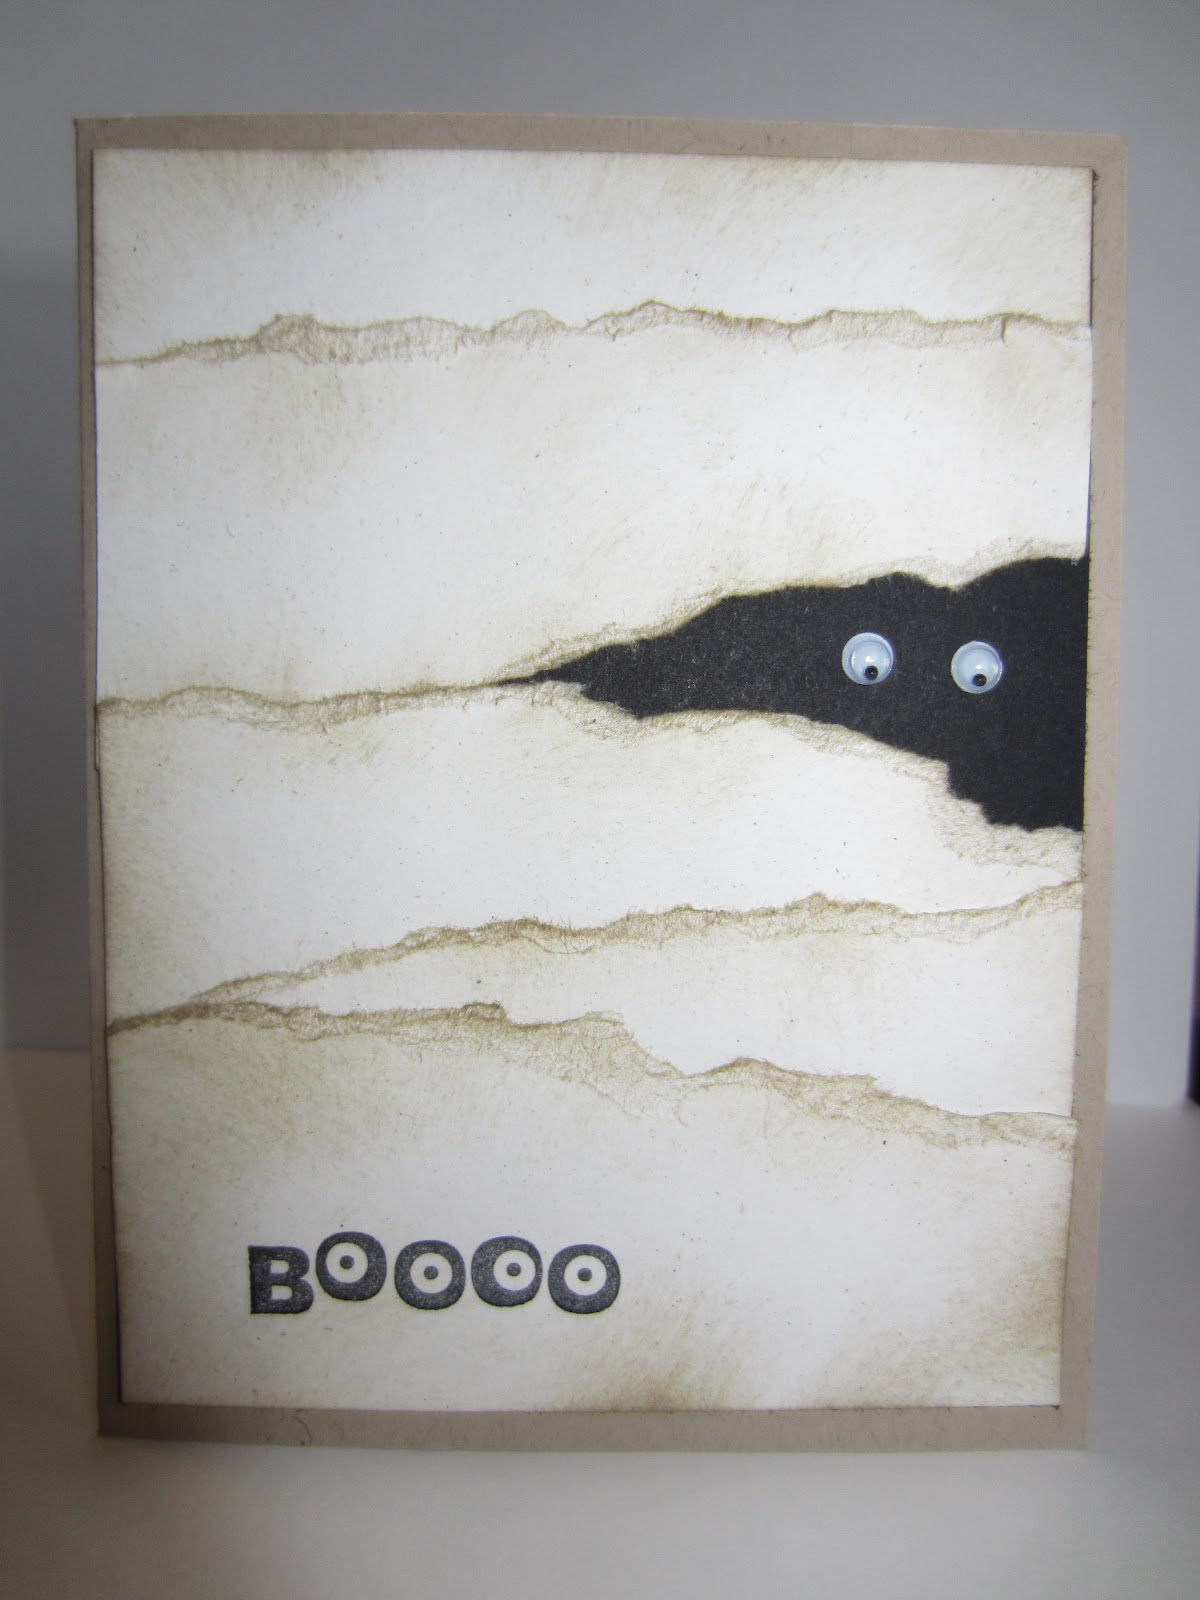
This adorable mummy card isn't CASEd from the catalogue, but it is CASEd from this card by "Doodlebop" (her Splitcoast Stampers name). I couldn't resist - how cute is this card?
Finally, these cute flowers are featured on page 99 of the Annual Catalogue in an assortment of colours. I used Rich Razzleberry with Daffodil Delight for this one.
Hope you enjoy these CASEd creations. I think my Stamp Club ladies will like them.
Blessings to you,
This first card is a CASE of the card on page 31 of the Holiday Catalogue. I used the You Are Loved set instead of Tweet Leaves. The colours are Cajun Craze, Pool Party, Lucky Limeade, More Mustard and Early Espresso.
Of course, we have to do a little Halloween treat, so I used the Ghoulish Googlies designer kit and copied the sample on p. 27 of the Holiday Catalogue. I added one of the round tags as a bag topper, just folding it over the top of the glassine bag and stapling it. The oval tag covers the staple. (It's filled with gummy pumpkins - my favourite!)
This adorable mummy card isn't CASEd from the catalogue, but it is CASEd from this card by "Doodlebop" (her Splitcoast Stampers name). I couldn't resist - how cute is this card?
Finally, these cute flowers are featured on page 99 of the Annual Catalogue in an assortment of colours. I used Rich Razzleberry with Daffodil Delight for this one.
Hope you enjoy these CASEd creations. I think my Stamp Club ladies will like them.
Blessings to you,
Wednesday, October 3, 2012
October Scrapbook Club Layout
I thought it would be fitting to do a Halloween layout for our October club meeting, and I absolutely love the Googly Ghouls stamp set! I'm not a big Halloween person, and I don't usually buy those sets; I opt instead for Fall/Thanksgiving-themed sets. But, I couldn't resist this adorable set, especially once you add those googly eyes to it! I also happened to stumble across this gorgeous layout by Kay Kalthoff, and I figured why re-invent the wheel when she's done such a wonderful job. So we're making a CASE of her layout for our club meeting. Here it is:
This layout uses the Howlstooth designer series paper, along with the googlies, some glimmer brads and our new silver frames. So cute!
Blessings to you,
This layout uses the Howlstooth designer series paper, along with the googlies, some glimmer brads and our new silver frames. So cute!
Blessings to you,
Friday, September 21, 2012
Adhesive 101 Special
My good friend and fellow demonstrator, Donna Wizniuk, came up with a great
special for the end of September, and I decided to borrow her idea and
offer you the same deal! It's called Adhesive 101. Here's how it works:
We all use adhesives, but we often don't think to order them, so this special allows you to stock up on them, plus get a free spool of ribbon with the September Back to Spool Stampin' Up! special.
You'll get the following adhesives (the ones I use the most):
This offer is valid until Tuesday, September 25. Please contact me by Tuesday to let me know which option you would like (SNAIL refills or adhesive + refills) and what colour stitched satin ribbon you'd like. (This offer is not available through online orders because the discounted price is my own special offer, and not from Stampin' Up! Offer is only available to those in my immediate area, otherwise a $9.95 shipping fee will apply for other Canadian residents.)
Here's the 101 portion of the special: the adhesive education portion!
Be sure and check out page 177 for uses on all the adhesives SU sells.
Glue Dots - the thing I use glue dots for the most is attaching buttons, ribbon bows, chipboard pieces.....great for attaching small, light weight pieces.
Stampin' Dimensionals - used to POP IT UP, I use dimensionals on 90+% of the projects I make!
SNAIL Adhesive - SNAIL is my GO TO adhesive. I always use it for adhering layers, cardstock to cardstock(or pattern paper). AND.....it's new and improved, watch your next order(the roll on the dispenser is now blue, was white). It applies much better(full coverage), and seems stickier.
Multipurpose Liquid Glue- I reach for liquid glue when adhering pieces that may need positioning or when there are several layers of something you need to have lined up evenly. Being it is a liquid and needs time to dry, it allows you slide time. This means you have time to adjust the pieces you are layering. It also works great for adhering chipboard. A word of caution, though, when applying, use sparingly. When you press to adhere, excess will surface from the sides, and will be visible once dry. Tombow mono is a very strong adhesive, it is more cost effective than double sided tapes. If you don't mind the liquid aspect, the drying time........this adhesive is a GREAT choice. I also use it on my clear mount stamps to make them stick to the clear blocks better. Just apply a thin coat of it to the back of the stamp and let it dry. The stamp becomes "tacky" and sticks really well to the blocks!
2-Way Glue Pen - I LOVE this adhesive for attaching glitter. It dries clear and can be used for lightweight tiny pieces where it is hard to attach SNAIL.
Sticky Strip - Sticky Strip is the TOUGH one. I use it when I want to be sure something is going to STICK, and stick for a long time. It's great for heavier weighted projects, 3-D items, party favours (treat boxes), home decor, textured or glossy surfaces. CAUTION: once you have something in place using Sticky Strip you will not have much success in trying to reposition. Once it's down, it's down! The option of changing your mind isn't really an option.
Thank you, Donna, for this great idea!
Blessings,
We all use adhesives, but we often don't think to order them, so this special allows you to stock up on them, plus get a free spool of ribbon with the September Back to Spool Stampin' Up! special.
You'll get the following adhesives (the ones I use the most):
- glue dots
- stampin' dimensionals
- 4 x SNAIL adhesive refills OR 1 SNAIL adhesive + 2 refills
- multipurpose liquid glue
- 2-way glue pen
- sticky strip
- spool of stitched satin ribbon in your choice of colour (Gumball
Green, Midnight Muse, Primrose Petals, Raspberry Ripple or Summer
Starfruit)
This offer is valid until Tuesday, September 25. Please contact me by Tuesday to let me know which option you would like (SNAIL refills or adhesive + refills) and what colour stitched satin ribbon you'd like. (This offer is not available through online orders because the discounted price is my own special offer, and not from Stampin' Up! Offer is only available to those in my immediate area, otherwise a $9.95 shipping fee will apply for other Canadian residents.)
Here's the 101 portion of the special: the adhesive education portion!
Be sure and check out page 177 for uses on all the adhesives SU sells.
Glue Dots - the thing I use glue dots for the most is attaching buttons, ribbon bows, chipboard pieces.....great for attaching small, light weight pieces.
Stampin' Dimensionals - used to POP IT UP, I use dimensionals on 90+% of the projects I make!
SNAIL Adhesive - SNAIL is my GO TO adhesive. I always use it for adhering layers, cardstock to cardstock(or pattern paper). AND.....it's new and improved, watch your next order(the roll on the dispenser is now blue, was white). It applies much better(full coverage), and seems stickier.
Multipurpose Liquid Glue- I reach for liquid glue when adhering pieces that may need positioning or when there are several layers of something you need to have lined up evenly. Being it is a liquid and needs time to dry, it allows you slide time. This means you have time to adjust the pieces you are layering. It also works great for adhering chipboard. A word of caution, though, when applying, use sparingly. When you press to adhere, excess will surface from the sides, and will be visible once dry. Tombow mono is a very strong adhesive, it is more cost effective than double sided tapes. If you don't mind the liquid aspect, the drying time........this adhesive is a GREAT choice. I also use it on my clear mount stamps to make them stick to the clear blocks better. Just apply a thin coat of it to the back of the stamp and let it dry. The stamp becomes "tacky" and sticks really well to the blocks!
2-Way Glue Pen - I LOVE this adhesive for attaching glitter. It dries clear and can be used for lightweight tiny pieces where it is hard to attach SNAIL.
Sticky Strip - Sticky Strip is the TOUGH one. I use it when I want to be sure something is going to STICK, and stick for a long time. It's great for heavier weighted projects, 3-D items, party favours (treat boxes), home decor, textured or glossy surfaces. CAUTION: once you have something in place using Sticky Strip you will not have much success in trying to reposition. Once it's down, it's down! The option of changing your mind isn't really an option.
Thank you, Donna, for this great idea!
Blessings,
Merry Minis!
This card is one that I prepared as a make & take for our large group meeting last weekend. It is a CASE of a card that was apparently shown at Convention (I wasn't there, but I was sent a photo of a similar card to make for this event).
I LOVE the new Merry Minis stamp set with matching mini punches. They are so cute! This card also used the new Festive Paper Piercing Pack, which includes a whole bunch of ornaments. A trick for this card is that for the sentiment tag, you can use the top of the mini Christmas tree punch to make the little "v's".
Enjoy!
Blessings to you,
I LOVE the new Merry Minis stamp set with matching mini punches. They are so cute! This card also used the new Festive Paper Piercing Pack, which includes a whole bunch of ornaments. A trick for this card is that for the sentiment tag, you can use the top of the mini Christmas tree punch to make the little "v's".
Enjoy!
Blessings to you,
Tuesday, September 18, 2012
Just For Fun, Just Believe!
I actually had time today to do some stamping JUST FOR FUN! How novel! I decided to participate in a Splitcoast Stamper colour and sketch challenge (I combined the two). So the colours this week were Lucky Limeade, Pink Pirouette and Primrose Petals. Here's the card I came up with:
I used the Just Believe set, and I included some In Color designer series paper, embossed with the new Lacy Brocade embossing folder. I made the flowers sparkly with some Dazzling Diamonds glitter.
Thanks for reading!
Blessings to you,
I used the Just Believe set, and I included some In Color designer series paper, embossed with the new Lacy Brocade embossing folder. I made the flowers sparkly with some Dazzling Diamonds glitter.
Thanks for reading!
Blessings to you,
Friday, September 14, 2012
Card Box Instructions
I just wanted to post some instructions on how to make the card box that my Stamp and Scrapbook Club ladies made this week since a few people couldn't make it to the club, and they'll need to know how to make it with their supplies! Hopefully many of you will also find it useful.
BOX & BOW
There is a great tutorial for this box on Erica Cerwin's blog here (scroll down a bit for the box tutorial). Here are the supplies you'll need:
To make the bow, you'll need a half-sheet (6 x 12") of designer series paper, cut into the following:
CARDS
The cards are pretty straight-forward. I wanted to keep them simple so the ladies could finish them and the box with envelopes in a couple of hours.
Here are the supplies for the cards:
ENVELOPES
For the envelopes, you will need 7-3/4" squares of designer series paper (one per card). Use the Simply Scored tool with the diagonal plate.
Score the first side at 3-1/8". Rotate the paper 180 degrees and score the opposite side at 3-1/8".
Turn the paper 90 degrees and score at 4-1/8". Rotate another 180 degrees and score the opposite side at 4-1/8".
Snip out the corners where the scored lines intersect. You may need to fold the scored lines to see them clearly on the designer series paper. You can use paper snips or a 1" square punch as shown.
Fold the flaps and snip off the top part of the front flap. Adhere the edges of the front flap and glue the flaps together.
And that's how you make the box, bow, cards and envelopes! Please feel free to comment or contact me if you have any questions.
Blessings to you,
BOX & BOW
There is a great tutorial for this box on Erica Cerwin's blog here (scroll down a bit for the box tutorial). Here are the supplies you'll need:
- cardstock (Cherry Cobbler here) - 7 x 11" and 6 x 7"
- designer series paper (Be of Good Cheer here) - 3-3/4 x 4-3/4" and 2-1/4 x 6-1/2" (2) for decorating the box. Score the two longer strips diagonally from the top at zero. Cut the diagonal line so the paper will fit on the side of the box. You will need to flip one of the sheets of paper and score the opposite side so that the same pattern will show on each side of the box (see photo below).
- designer series paper - 1-1/2 x 12" and 1-1/2 x 6" for band (glue the strips together and wrap them around the box)
- Simply Scored tool with diagonal plate
To make the bow, you'll need a half-sheet (6 x 12") of designer series paper, cut into the following:
- 6 x 1" (8)
- 5 x 1" (4)
- 4 x 1" (1)
CARDS
The cards are pretty straight-forward. I wanted to keep them simple so the ladies could finish them and the box with envelopes in a couple of hours.
Here are the supplies for the cards:
- card bases (Gumball Green and Cherry Cobbler here) - standard 5-1/2" x 8-1/2", scored at 4-1/4"
- Very Vanilla - 3-1/4 x 4-1/2" (one per card)
- designer series paper (Be of Good Cheer here) - 1-1/2 x 3" (one per card)
- ribbon (Cherry Cobbler polka dot scallop, Gumball Green stitched satin and 7/8" cotton ribbon here) - about a 4" section per card
- rhinestone jewels
ENVELOPES
For the envelopes, you will need 7-3/4" squares of designer series paper (one per card). Use the Simply Scored tool with the diagonal plate.
Score the first side at 3-1/8". Rotate the paper 180 degrees and score the opposite side at 3-1/8".
Turn the paper 90 degrees and score at 4-1/8". Rotate another 180 degrees and score the opposite side at 4-1/8".
Snip out the corners where the scored lines intersect. You may need to fold the scored lines to see them clearly on the designer series paper. You can use paper snips or a 1" square punch as shown.
Fold the flaps and snip off the top part of the front flap. Adhere the edges of the front flap and glue the flaps together.
And that's how you make the box, bow, cards and envelopes! Please feel free to comment or contact me if you have any questions.
Blessings to you,
Labels:
Christmas,
Simply Scored,
Stamp Club,
Tutorial
Friday, September 7, 2012
Evergreen Glimmer
I love the new Evergreen stamp set in the Holiday catalogue. I recently saw this card by Heather Cooper, and I fell in love with it, so I had to CASE it.
The card base is Cherry Cobbler. I stamped the Woodgrain background on some Very Vanilla cardstock in Soft Suede ink, then swiped the ink pad over the edges of the vanilla paper. I used the Labels Framelits with the Big Shot for the Always Artichoke, Champagne Glimmer and Very Vanilla layers. The tree is stamped in Always Artichoke, then I embossed the words over the tree with gold embossing powder. Finally, there are some dots of Cherry Cobbler dazzling details over the tree with a rhinestone jewel at the top. Some Cherry Cobbler seam binding finishes off the card.
Thanks for stopping by!
Blessings,
The card base is Cherry Cobbler. I stamped the Woodgrain background on some Very Vanilla cardstock in Soft Suede ink, then swiped the ink pad over the edges of the vanilla paper. I used the Labels Framelits with the Big Shot for the Always Artichoke, Champagne Glimmer and Very Vanilla layers. The tree is stamped in Always Artichoke, then I embossed the words over the tree with gold embossing powder. Finally, there are some dots of Cherry Cobbler dazzling details over the tree with a rhinestone jewel at the top. Some Cherry Cobbler seam binding finishes off the card.
Thanks for stopping by!
Blessings,
Subscribe to:
Posts (Atom)