Thursday, May 31, 2007
Stamp-a-Stacks
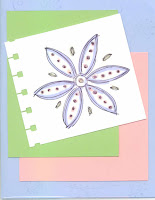
I've been doing quite a few stamp-a-stacks lately, and I absolutely love them! It's so nice to get together with a group of ladies and just make cards and chat. It's a great way to get to know people better. For my stamp-a-stacks (SAS), I charge $30 and people get to make 20 cards (5 each of 4 different designs). Above are a few of the cards we did at my SAS this month. I pre-cut everything, and they just stamp them and put them together. They get to learn some stamping techniques and try out Stampin' Up!'s amazing products as well. The rose card design was borrowed from a demonstrator who submitted the card to the Stampin' Up! demonstrator site (her name is Robin Caron). I borrowed the basic layout of the navy from my upline, Sarah Hunter, and turned it into a buckle card. For the Doodle This card, I used the new spiral punch from the Spring Mini catalogue. I also put Crystal Effects on the dots of the flower. You can't see it well in the picture, but it makes them 3-D and the color comes up into the dots. It's really a cool effect. I love the doodles notebook page look from this stamp set and punch! (All images copyright Stampin' Up! 1999 - 2007.)
Monday, May 28, 2007
View-Master Card
This is the card that my stamp club made at our last meeting. I just got the Spring Bouquet punch, "Simply Said" stamp set and the Spring Showers paper, so I was excited to get to use them to make this card. The directions for the card are here on splitcoast stampers. (All images copyright Stampin' Up! 1999 - 2007.)
Pouch of Cards
Just click on the image to see it enlarged. This is a craft that my friend, Treena Hrytsak showed me. She learned it at a stamp class. I will be doing this craft at my church's Ladies' Retreat at the end of April. I think it's really a cute idea. It's a pouch made from a 6 x 6 album page protector and lined and decorated. The pouch is held closed with a little velcro tab. Then there are six coordinating cards made with designer paper and matching cardstock, along with envelopes. Basically, there is a template for each card, so no matter what the design on your paper, you just follow the templates and make your cards. If anyone would like a copy of the template, just email me and I'll forward it to you. (All images Copyright Stampin' Up! 1999-2007.)
Triangle Tri-Fold Card
Here's another great card from Splitcoast Stampers that is surprisingly easy to make. I used the Both Way Blossoms hostess set with Sarah Designer Series paper. Click here for instructions. (All images copyright Stampin' Up! 1999 - 2007.)
Big Buckle Card
I love this card! It's so easy to do, and it looks so cool! I used the Wild Rose stamp set with the Recollections Designer Series paper with Cranberry Crisp and Mellow Moss ink. Click here for instructions on how to make the card. (All images copyright Stampin' Up! 1999 - 2007.)
Jar of Cards
At our large group meeting in Millet a few weekends ago, we learned this fantastic project called "Jar of Cards". I will give the credit for the idea to Wendy Knowles. It was taught to us by Winona Semler. I love this project - it took me about an hour and a half to finish, and it's a great gift idea. I'm going to offer this as a stamp camp in May for any of you who are interested in making it. It includes 24 mini cards (3 x 3) and envelopes, along with the jar. Check out my e-newsletter for more information. If you'd like to receive my newsletter, but you don't already, just email me and I'll add you to my mailing list. (All images copyright Stampin' Up! 1999 - 2007.)
Stamping on Tiles
I think I've finally gotten the hang of stamping on tiles. Okay, so it's not my favourite thing. I prefer card-making and scrapbooking, but I have a friend who asked my to do a class on stamping on tiles, so I had to figure out how to do it. It took a few (really ugly!) practice tiles - I won't post those because it's too scary. (By the way, you need tiles that are not glossy-finished. The ink will not stick to them!) I asked my upline, Sarah Hunter, for help. She is amazing! Here are the instructions:
1. Clean the tile with rubbing alcohol.
2. Stamp your image(s) with Staz-On ink (this stuff is permanent, dries immediately, and stains everything!). Heat set the images with a heat tool (embossing gun).
3. Color in the images as you prefer with markers, blender pens and ink or blender pens and pastels.
4. Heat set again.
5. After the ink is completely dry, spray the tile with acrylic finish spray. Once this is dry, your stamped images should stay!
6. Attach some self-adhesive felt pads to the bottom of the tile so it doesn't scratch whatever surface you set it on.
I have to admit that I have changed my mind about the whole stamping on tiles thing. Once you get the hang of it, it's pretty fun, and I actually like the way mine turned out. (All images copyright Stampin' Up! 1999 - 2007.)
Mini Scrapbook Tin
This is a project that I did for some ladies at my church's all-day scrapbooking event. It's a mini scrapbook in a business card CD tin (you can get these at www.scrapbooking.ca.) I had ordered the tins to decorate to hold my business cards, not realizing that it was for business card CDs, so standard-sized business cards do not fit in it! I didn't know what I was going to do with all these extra tins, so I modified an idea that I learned at a Stampin' Up! demonstrator meeting. There, we were shown how to make a scrapbook from a larger tin (the one that comes with the SU! Accents & Elements stickers). I thought it would be cute to make a mini one (purse-sized!).
All we did was trace the tin cover and insides onto designer paper (Stampin' Up! of course!) and cut these out. Then we sanded the cover of the tin and applied mod podge over the whole cover. Then we applied the paper to the cover and covered it with mod podge again so it set. For the inside, we applied the paper to the inside covers using sticky strip double sided tape. Then we made an accordion-style scrapbook out of Very Vanilla cardstock and adhered that to the inside back cover of the tin using sticky strip, making sure that it pulled open to the right. Then all you do is scrapbook the pages and fold them up inside the tin. You can embellish the outside as you like.
Stamping on Candles
I finally got around to trying the stamping on candles thing, and I can't believe how easy it is! All you do is stamp an image on tissue paper (I used the "Measure of a Life," "Polka Dots and Paisley" and "Delight in Life" stamp sets, all from Stampin' Up!) Then you cut out the image very close to the edge and place it on the candle. Then cover it with wax paper. Then take a heat tool and heat up the image until it melts into the candle. Remove the wax paper, and voila! I used Old Olive dye ink for the "Measure of a Life" candle and Pixie Pink, Cool Caribbean and Glorious Green ink for the "Polka Dots and Paisley" candle (all SU!) I did burn my fingers a couple of times with the heat tool, but it's all good!